The most common mistake new homeowners make is treating the final walkthrough as a formality. You have the keys almost in hand, the moving truck is booked, and the house looks finished, so it is tempting to spend 30 minutes admiring the kitchen and sign the form. That signature often means you accepted the visible condition of the home. A scratch on the countertop or a gouge in the hardwood that is not on the punch list that day can be hard to claim three months later, because the builder can reasonably argue it happened during your move. A careful walkthrough, a clear reading of your warranty and one well-timed inspection before the first anniversary protect the biggest purchase most families ever make.
What the final walkthrough is and how to prepare
The final walkthrough, sometimes called the pre-closing orientation or blue-tape walk, usually happens a few days to a week before closing. The builder's superintendent or customer service representative walks you through the home, shows you how the systems work and records anything that still needs attention. That list becomes the punch list, and the builder commits to completing it, ideally before closing or within an agreed window afterward.
Bring the right tools
- A roll of blue painter's tape to mark every defect where you find it
- A phone charger or a small outlet tester, plus a GFCI tester if you have one
- A flashlight for closets, the attic hatch and under sinks
- A small level and a marble or ball to check floors and countertops
- A printed copy of your plans, selections sheet and any change orders
Give yourself time
Plan on two to three hours for a typical 2,000 to 3,000 sq ft home, more for a larger one. A house like this 4-bedroom, 4.5-bath Modern Farmhouse of 4143 sq ft has five bathrooms' worth of faucets, drains and exhaust fans to test, plus a three-car garage, and rushing it in an hour guarantees you will miss things. Schedule the walk in daylight, ask that the utilities be on and the HVAC running, and leave the kids and the movers out of it.
Room-by-room punch list for the final walkthrough
Work the same way in every room: ceiling, walls, windows, doors, floor, then fixtures and outlets. Consistency is what keeps you from skipping things.
Drywall and paint
Look at walls at a low angle with your flashlight. Note nail pops, visible tape seams, uneven texture, drips, missed spots, and paint on hinges, outlets or trim. Check inside closets and behind doors, where touch-ups are most often skipped. Inside corners and the line where walls meet the ceiling should be clean and straight.
Doors, windows and trim
- Open and close every door. It should latch without slamming, stay where you leave it and not rub the jamb.
- Check exterior doors for daylight around the weatherstripping and a threshold that seals.
- Operate every window, test the locks and look for cracked glass, fogging between panes and missing screens.
- Look for gaps in caulk at trim, baseboards and window casings.
Kitchen and bathrooms
Run every faucet hot and cold for a minute, fill and drain every sink and tub, flush every toilet, and then look under each cabinet for drips with your flashlight. Check that the shower valve reaches comfortable hot water, that tile grout is complete and that caulk lines at tubs and countertops are continuous. Open every cabinet door and drawer. Run the dishwasher, disposal, range hood and bathroom exhaust fans. Confirm that appliances match your selections sheet by model.
Floors and stairs
Walk the whole house listening for squeaks. Look for scratched hardwood or LVP, lifted seams, cracked tile and carpet seams that show. On stairs, check that treads are solid and that railings do not wobble.
Electrical and HVAC
Plug your tester into every outlet, including exterior and garage outlets. Press the test and reset buttons on GFCI outlets and confirm the panel is labeled. For heating and cooling, put your hand over every supply register: each one should blow with noticeable force. Rooms far from the air handler, bonus rooms over the garage and second-floor bedrooms are the usual problem areas. Ask where the filter is, how often to change it, and where the condensate line drains.
A one-story layout simplifies this part of the walk, since ductwork is shorter and there are no stairs or second-floor zones to balance.

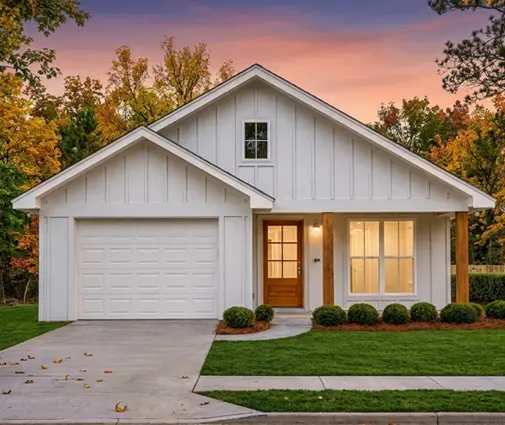

Compare the 3-bedroom Ranch farmhouse of 1706 sq ft with a 2-car garage to the two-story Craftsman of 2920 sq ft with 3.5 baths: the second one has an upstairs that is often a few degrees warmer in summer, and that is worth checking during the walk and again before the 11-month mark. If you are still choosing a design, single-level homes in the Ranch collection show how compact a full family layout can be.
Outside the house: grading, roof and the garage slab
Grading and drainage
Water is the enemy of every foundation, whether you built on a slab in Texas or over a basement in Ohio. The IRC calls for the ground to slope away from the foundation, generally a fall of 6 inches within the first 10 feet, though local amendments and lot conditions can change that. Look for soil sloping toward the house, downspouts that dump against the foundation, low spots that will hold water and window wells without drains. If you can, revisit the lot after a heavy rain before closing.
Roof, siding and exterior
From the ground, look for missing or lifted shingles, crooked gutters, gaps in siding or trim, and unpainted areas. Check that the hose bibbs work and that dryer and bath fan vents have flaps that close.
Garage slab and driveway
Almost every concrete slab cracks. Thin hairline shrinkage cracks in a garage floor or driveway are normal and usually not covered. What matters is width, vertical displacement (one side higher than the other) and whether a crack keeps growing. Most warranties set a specific threshold in their performance standards, so read yours and measure any crack with a coin or ruler at the walkthrough. Photograph it with a tape measure in the frame so you have a dated reference. On a home with a 3-car garage, the slab is large enough that you should walk it end to end.
What a 1-2-10 builder warranty covers and excludes
Many U.S. builders, especially production and semi-custom builders, provide what is commonly called a 1-2-10 warranty, often backed by a third-party warranty company. The terms differ from builder to builder and some states add their own statutory protections, so the document you receive at closing is what counts. The typical structure looks like this:
| Period | Typically covers | Typically excludes |
|---|---|---|
| Year 1 | Workmanship and materials: drywall, paint, trim, doors, cabinets, flooring, siding, roofing, concrete beyond stated tolerances | Minor shrinkage cracks, normal settling, cosmetic damage not noted at the walkthrough, homeowner damage |
| Year 2 | Mechanical system distribution: plumbing supply and drain lines, electrical wiring, HVAC ductwork | Appliances and equipment covered by manufacturer warranties, clogged drains, fixtures, filters |
| Years 3 to 10 | Major structural defects in load-bearing elements: foundation, framing, beams, bearing walls | Damage that does not affect the load-bearing function, soil movement in some policies, flooding, consequential damage |
The exclusions that surprise homeowners
- Maintenance: caulking, grout sealing, gutter cleaning and filter changes are your job, and neglecting them can void related coverage.
- Landscaping: sod, trees and irrigation often have very short coverage or none.
- Appliances and the water heater: usually handed off to the manufacturer.
- "Structural" is narrow: a cracked tile over a slab is not a structural defect unless the slab itself has failed in a way that affects the load-bearing function.
Coastal and hurricane-zone homes deserve an extra careful read, since wind and water damage are usually homeowner's insurance matters, not warranty claims. A raised design like this 5-bedroom, four-story coastal home of 4070 sq ft has more exterior envelope, decks and flashing to watch over the first year than a slab ranch inland.
The first year: how to document and report problems
Most builders want warranty requests in writing through a portal or email, and many schedule routine service visits at about 60 days and again near 11 months. Emergencies like a leak or a loss of heat usually go to a separate phone line.
- Keep one running list, with the date each issue appeared and a photo.
- Submit non-urgent items in batches rather than one call per nail pop.
- Report anything that can get worse, such as a leak or a growing crack, right away. Delay can turn a covered repair into an excluded one.
- Get every repair confirmed in writing, and note when it was completed.
Expect some normal settling during the first heating and cooling seasons. Lumber dries, so a few nail pops, small trim gaps and minor drywall cracks are common in wood-frame homes and are exactly what the first-year coverage is for.
The 11-month inspection: your last easy chance
Before the one-year workmanship period ends, hire an independent home inspector, ideally one experienced with new construction, to go through the house as if you were buying it from someone else. By then the home has lived through most of a year of weather, so problems that did not exist at closing have had time to show up.
What an inspector catches that you do not
- Attic issues: missing or compressed insulation, disconnected bath fan ducts, roof leaks around penetrations
- Crawl space or basement moisture, plumbing leaks and grading that settled toward the house
- Roof flashing problems and siding gaps you cannot see from the ground
- Electrical defects, reversed polarity and missing GFCI or AFCI protection
- Uneven airflow and temperature differences between floors
In 2025, an 11-month warranty inspection usually cost somewhere around $350 to $700 depending on the size of the house and the region, with thermal imaging or sewer scopes as extras. On larger multi-story homes, that is easily repaid by a single item the builder has to fix.



Homes like the 3-bedroom Modern Farmhouse of 2983 sq ft with a 3-car garage or the 2-story farmhouse of 2823 sq ft with 3.5 baths have exactly the features inspectors focus on: large attic areas, multiple bathrooms and an upstairs HVAC zone. Look through the 2-story collection and you will see how many of these points repeat in almost every design.
Timing matters
Book the inspection around month 10 so you have the report in hand and your written request submitted before the anniversary of closing. Send the full report to the builder, ask for a written response item by item and keep everything in the same file as your warranty documents.
FAQ
Should I hire an inspector for a brand-new home before closing?
Many buyers do, and it can be worth it, especially if you did not get a pre-drywall inspection. A pre-closing inspection gives you a professional punch list to bring to the walkthrough. The 11-month inspection is a separate visit and catches problems that only appear after the house has been lived in.
Can I refuse to close if the punch list is not finished?
That depends on your purchase contract, which usually spells out what counts as complete. Lenders often need a certificate of occupancy and an appraisal, not a finished punch list. Talk to your agent or a real estate attorney before you decide to delay closing.
Does the builder warranty transfer if I sell the house?
Many third-party 1-2-10 warranties transfer to the next owner for the remainder of the term, sometimes after a notice or a fee. Check the transfer clause in your document, since a remaining structural warranty can reassure buyers.
Are garage floor cracks covered?
Hairline shrinkage cracks usually are not. Cracks that exceed the width or height difference set in your warranty's performance standards within the first year generally are. Measure and photograph them at the walkthrough and again at the 11-month inspection.