Siding is not waterproof. Vinyl, fiber cement, lap wood and even brick veneer all let some rain get behind them, especially when wind drives it sideways. In a 2x6 wood-frame wall, the layer that actually stops that water is a thin sheet of house wrap or a coating on the sheathing, plus a few feet of flashing tape around each window. When those details are done wrong, the damage rarely shows for years. By the time a homeowner notices a soft spot under a window or a stain on the drywall, the OSB behind the siding can be black. This guide explains, in plain terms, how a wall is supposed to handle water, which barrier options builders use, how windows should be flashed, and what you should check with your own eyes before the siding goes on.
What the Weather-Resistive Barrier Actually Does
The International Residential Code, which most U.S. cities and counties adopt with local amendments, requires a water-resistive barrier (often called a WRB or weather-resistive barrier) behind exterior cladding, and flashing at windows, doors and other penetrations. The exact wording and approved products vary by jurisdiction and code edition, so confirm the current requirements with your building department or your engineer.
The WRB has three jobs:
- Stop liquid water that gets past the siding and send it down and out at the bottom of the wall.
- Let water vapor pass so moisture inside the wall can dry outward. Most modern wraps and coatings are vapor-permeable for this reason.
- Reduce air leakage, if it is taped and sealed carefully. This is a bonus, not a given; a loosely stapled wrap does little for airtightness.
The rule behind every good wall is simple: each layer overlaps the one below it, like shingles on a roof. Water should always run onto the outer face of the next layer down, never behind it. Almost every leak in a new house is a place where that lap was reversed: wrap tucked behind a flange instead of over it, tape applied bottom-over-top, or a ledger board bolted on without flashing above it.
Where water usually gets in
- The lower corners of windows and doors, where water collects on the sill.
- Deck ledgers bolted to the rim joist without flashing over the top.
- Places where a lower roof meets a wall, especially the bottom end where a missing kickout flashing dumps water into the wall.
- Penetrations: dryer vents, hose bibs, electrical boxes, light fixtures.
- The bottom of the wall, where the WRB must lap over the foundation or a weep screed, not tuck behind it.
Complex houses have more of these spots. A plan like this 6-bedroom Craftsman lake house of 6776 sq ft with a basement has many roof-to-wall intersections, gables and porches, and each one needs careful step and kickout flashing. A simpler footprint, such as this one-story 3-bedroom Ranch of 2565 sq ft, has far fewer of these details to get wrong.
House Wrap, Fluid-Applied Barriers or Integrated Sheathing?
Three approaches cover most new single-family homes in the U.S. today. Any of them can work well; the quality of installation matters more than the product.
Mechanically attached house wrap
The traditional choice: rolls of spun polyolefin or similar material stapled or cap-nailed over OSB or plywood sheathing. It is cheap and every framing crew knows it. Its weak points are tears, seams lapped the wrong way, staples instead of cap fasteners, and wrap left exposed to sun or wind for weeks before the siding goes on. Some wraps have a textured or crinkled surface that creates a slight drainage gap.
Fluid-applied barriers
A liquid membrane rolled or sprayed onto the sheathing, with seams and openings treated with mesh or a thicker coat. It is seamless and very airtight when done right, and handles complex shapes well. It costs more, needs the right weather to cure, and the thickness depends on the applicator, so it is usually done by a specialist crew.
Integrated sheathing (ZIP System and similar)
Panels of OSB with a factory-applied water-resistive facing. The seams are sealed with a special tape, so the sheathing and the barrier go on in one step. It is popular because it gets a house "dried in" quickly and is easy to inspect: you can see every seam. The tape must be rolled firmly with a roller, and damaged panel edges or nail heads driven too deep need attention.
| Option | Rough added cost (2025, installed) | Strengths | Watch for |
|---|---|---|---|
| House wrap over OSB | Lowest; often well under $1 per sq ft of wall | Cheap, familiar to every crew | Tears, reverse laps, staples, UV exposure |
| Fluid-applied barrier | Highest; often a few dollars per sq ft of wall | Seamless, airtight, good on complex shapes | Cure weather, uneven thickness |
| Integrated sheathing | Moderate premium over OSB plus wrap | Fast dry-in, easy to inspect | Poorly rolled tape, damaged edges |
These are rough ranges; prices vary a lot by region, crew and the year you build, so ask your builder for a line-item quote.
Flashing Windows and Doors in the Right Order
Window corners are the single most common source of hidden rot. Always follow the window manufacturer's installation instructions, because the warranty often depends on them. For a typical flanged window over house wrap, the sequence looks like this:
- Cut the wrap in a modified "I" pattern: across the top, across the bottom, and down the middle. Fold the side and bottom flaps into the rough opening. Cut a diagonal slit at each upper corner and tape the head flap up out of the way.
- Protect the sill. Install a sill pan or a sloped sill with flexible flashing tape that runs across the sill and several inches up each side. In wet or windy regions, many builders add a back dam or a small slope to the sill so water drains outward.
- Set the window with a bead of sealant behind the flange at the sides and the head. Leave the bottom flange unsealed or with gaps, so any water that gets in can drain out instead of being trapped.
- Tape the side flanges (jambs) first, extending past the top and bottom of the window.
- Tape the head flange over the side tapes, and add a head flashing or drip cap if the siding and trim call for one.
- Lower the head flap of the wrap over the head tape, then tape the diagonal cuts.
The order matters more than the brand of tape. Bottom, sides, top: each piece laps over the one below. With integrated sheathing or a fluid-applied barrier, the logic is the same, but the barrier is already on the sheathing, so the window goes over it and the tape connects the flange to the panel face.
Exterior doors need the same care, and a sill pan is even more important because door thresholds see standing water. Homes with many large openings, such as this two-story 4-bedroom Modern Farmhouse of 3750 sq ft or the plans in the large windows collection, multiply the number of corners that must be done right.



Decks, Porches and Roof-to-Wall Joints
A deck ledger bolted to the house is a direct path for water into the rim joist. The usual approach is to remove or cut the wrap, install flashing behind the ledger and over its top so water is directed onto the outside of the WRB below, and use spacers or a specific flashing system recommended by the deck hardware maker. Your local deck code or the inspector can confirm what is required.
Porch roofs and lower roofs that die into a wall need step flashing at every course of shingles, lapped under the WRB above, and a kickout flashing at the bottom end. Without a kickout, the whole roof edge pours water into the wall right where it meets the siding. Plans with deep porches, like this Low Country farmhouse with 4 bedrooms on two stories, 2505 sq ft, or anything from the wraparound porch collection, deserve extra attention here.
When a Rainscreen Gap Is Worth It
A rainscreen is a small air space, typically a fraction of an inch up to about 3/4 inch, between the WRB and the siding. It is made with vertical furring strips or a drainage mat. The gap lets water run down freely and lets the back of the siding and the sheathing dry.
A rainscreen is most worth considering when:
- You live in a region with heavy rainfall or wind-driven rain, such as the Pacific Northwest or the Gulf and Atlantic coasts.
- The siding absorbs water: wood, fiber cement, or "reservoir" claddings like stucco and manufactured stone, where local codes often require extra drainage layers.
- The wall has exterior foam insulation and the siding is attached through furring anyway.
- The house has tall, exposed walls with little roof overhang, which is common in modern and coastal designs.
The cost is usually modest compared with the total build, often in the range of a dollar or a few per square foot of wall in 2025, plus extra trim work around windows. For tall elevated homes in hurricane zones, such as this four-story coastal beach house with 3 bedrooms and 3021 sq ft, where wind-driven rain hits every side, many builders treat a drainage gap as standard practice. Check with your local engineer, since high-wind zones also have specific fastening rules for siding.
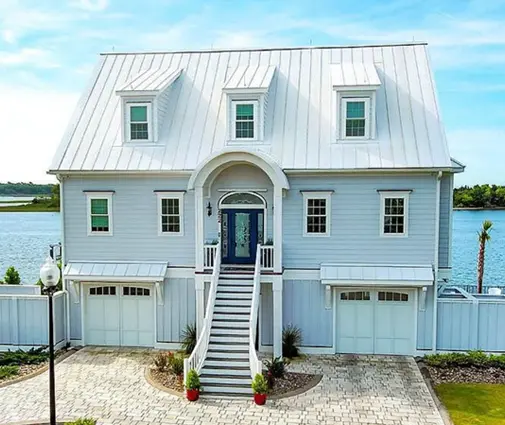


For more elevated designs, browse the beach house plans.
What to Photograph and Check Before the Siding Goes On
Once siding is installed, every detail above disappears for decades. Ask your builder when the WRB and windows will be finished, and walk the house before cladding starts. Take dated photos of every elevation and every opening. Look for:
- Laps: upper rows of wrap overlap lower rows, and vertical seams overlap by several inches.
- Fasteners: cap nails or cap staples, not bare staples; no large tears.
- Window corners: sill flashing visible and turned up the jambs; head tape over side tape; head flap of wrap lowered and taped.
- Door sills: a pan or flashing under every exterior door.
- Kickout flashing at the bottom of every roof-to-wall joint.
- Deck ledgers: flashing visible above and behind the ledger.
- Penetrations: vents, pipes and boxes taped or set in flashing blocks.
- Bottom of the wall: WRB lapping over the foundation or flashing, not tucked behind it.
- Integrated sheathing tape: firmly rolled, no wrinkles or lifted edges.
Photos help with future repairs, and they are useful if a problem appears during the builder's warranty period. If something looks wrong, raise it in writing before the siding crew arrives; fixing it then costs minutes, later it costs a wall.
FAQ
Is house wrap required by code?
The IRC requires a water-resistive barrier behind exterior cladding, and house wrap is one of the common ways to meet it. Integrated sheathing and fluid-applied barriers are alternatives when they are approved products. Local amendments vary, so check with your city or county building department.
Is ZIP System better than OSB with house wrap?
Not automatically. Integrated sheathing is faster and easier to inspect, which reduces mistakes, but poorly rolled tape can leak like a torn wrap. A careful crew with house wrap can build an equally dry wall. Choose the system your builder installs well and lets you inspect.
Should the bottom of a window be caulked?
Generally no. Most manufacturer instructions call for sealant at the sides and head but leave the bottom flange open or partly open, so water that reaches the sill can drain outward. Follow the instructions for your specific window.
Can I add a rainscreen later?
Only by removing the siding, which is expensive. If you are unsure, decide during the planning stage, when the plans for your three-story Modern Farmhouse of 3143 sq ft or any other design are being adapted by your local drafter or engineer, so window trim and siding details account for the extra depth.