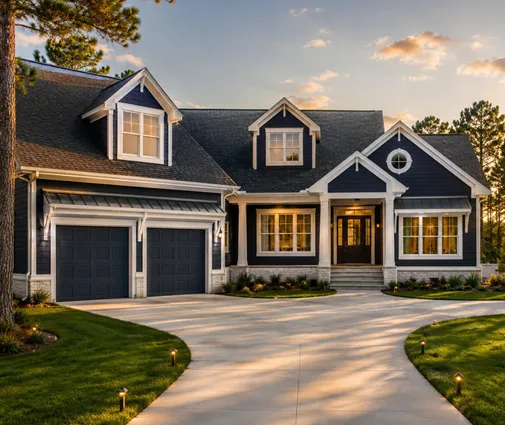
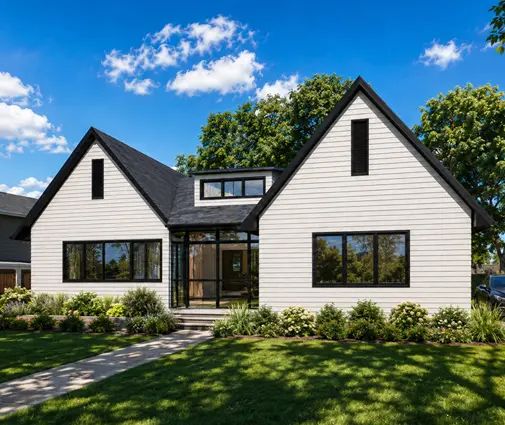
On a July afternoon in Texas or Georgia, the attic above a new house can climb past 130°F. That is where many builders still run the ductwork for the second floor, so air cooled to 55°F travels through an oven before it reaches the bedrooms. The ducts are insulated, but insulation slows heat gain without stopping it. Every leaky joint also blows paid-for air into the attic. The U.S. Department of Energy estimates that in a typical house, 20 to 30 percent of the air moving through the duct system is lost to leaks, holes and poor connections.
Most of this gets decided on paper, long before an installer shows up. A two-story house gives you more ways to keep ducts inside the thermal envelope than a sprawling ranch does, but only if the floor plan leaves room for them. The steps below follow the order in which you should make these decisions. That way the drafter or engineer adapting your stock plan, and the HVAC contractor bidding on it, are working from the same assumptions.
Step 1: Find out where the plan assumes the ducts will go
Most stock plans show the structure and the rooms, but not the duct layout. That is normal, because the mechanical design is left to the local contractor. The structure still dictates what is possible, so look at three things:
- The floor system between stories. Solid sawn joists or I-joists leave few paths for large trunk lines. Open-web floor trusses leave many.
- The attic. A vented attic with insulation on the ceiling puts anything up there outside the conditioned space.
- A spot for equipment. If no closet is drawn for an air handler, the default is usually the attic or the garage.
Time: an evening with the plan set. Cost: nothing yet, but every change made at this stage is cheap compared to one made after framing.
Step 2: Order a Manual J before anyone picks equipment
Manual J is the ACCA method for calculating heating and cooling loads room by room. It is the standard the IRC points to for sizing equipment. It uses your actual window areas and orientation, insulation levels, air tightness target and local design temperatures. The old "one ton per 500 square feet" rule of thumb does not. Pair it with Manual S, which selects the equipment, and Manual D, which sizes the ducts.
A tight, well-insulated house with ducts indoors often needs a noticeably smaller system than the rule of thumb suggests. A smaller system costs less, runs longer cycles and removes humidity better. Many jurisdictions now ask for a Manual J with the permit application, so check with your city or county building department.
Time: 1 to 2 weeks. Cost: in 2026, roughly $150 to $600 from an independent energy rater or designer. Some HVAC contractors include it in their bid.
Step 3: Use the floor between stories as your duct highway
In a two-story house, the space between the first-floor ceiling and the second-floor subfloor is already conditioned. Trunk lines run there lose almost nothing. There are two common ways to make room:
- Open-web floor trusses. Usually 14 to 18 inches deep, with openings that let round and rectangular ducts pass through in both directions. Ask your truss supplier to design a dedicated chase panel where the main trunk will run. Expect a premium over I-joists, often a few thousand dollars for a typical second floor, and lumber prices vary widely by region.
- Dropped soffits. A boxed-down section of ceiling, typically 12 to 16 inches deep, along a hallway, over kitchen cabinets or at the edge of a room. Frame and drywall it as part of the interior, and air-seal it to the floor above. Otherwise it simply becomes a duct in a void connected to the attic.
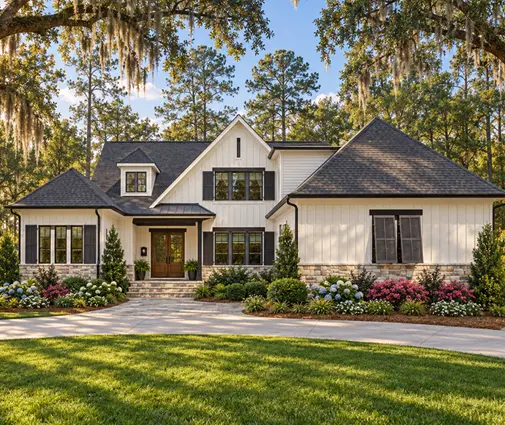
Plans with a stacked layout make this easier, with bedrooms above living areas and a central hall upstairs. The 4-bedroom Modern Farmhouse plan of 2,505 sq ft keeps the second floor compact, so short branch runs can drop down from a central trunk. You can browse more two-story house plans with that kind of stacking in mind.


Step 4: Decide what to do about the second-floor ceiling
The upstairs is the hard part, because the obvious place for supply ducts is the attic. You have three realistic options:
- Ceiling-height soffits and interior chases. Run ducts in a soffit along the upstairs hall and feed bedrooms through high sidewall registers. This needs some ceiling height to give up, so 9-foot ceilings help.
- An unvented (conditioned) attic. Insulate the roof deck instead of the ceiling, usually with spray foam or rigid foam above the deck. The attic then sits inside the envelope, along with any ducts and equipment up there. The IRC allows this under specific conditions that depend on climate zone, and your local amendments may add more. In 2026, the added cost commonly runs from about $4,000 to over $12,000, depending on roof area and complexity.
- Buried or encapsulated attic ducts. These stay in a vented attic but sit under deep blown insulation. They are better than ducts lying on top of the insulation, but still a compromise.
Roof shape matters. Simple gables are easier to insulate at the deck than cut-up hip and valley roofs with many dormers. A plan such as the 1,695 sq ft two-story coastal cottage with 4 bedrooms keeps the upstairs footprint tight, which shortens every run no matter where it goes.
Step 5: Give the air handler a central closet
A heat pump air handler belongs inside, near the middle of the house. There it serves both floors with short, balanced runs. On the plan, look for a spot such as:
- a closet off the upstairs hall or laundry room, roughly 4 by 4 feet or larger depending on the unit, with a door wide enough to replace it;
- space under the stairs, if a return and service access fit;
- a bonus room knee wall area, if it is inside the insulated envelope.
The closet needs a condensate drain, a return air path, an electrical circuit and a filter you can actually reach. Check the manufacturer's specification sheet for clearances before the drafter finalizes dimensions. Homes with a bonus room over the garage often have spare space next to it for a second small air handler. That is useful if you go with two systems in Step 6.
Larger plans, such as the 4-bedroom Modern Craftsman of 4,176 sq ft with a 3-car garage, usually have enough interior wall length to tuck in one closet per floor without losing a bedroom.
Step 6: Zone the two floors so the upstairs is not always hotter
Hot air rises, the roof absorbs sun, and one thermostat in the downstairs hall cannot see the bedrooms. Your choices:
| Approach | How it works | Typical added cost (2026) |
|---|---|---|
| Single system, balanced by Manual D | Ducts sized per room, no dampers | Included in base system |
| Single system with two zones | Motorized dampers and a thermostat per floor | About $2,000 to $4,500 |
| Two systems, one per floor | Separate heat pump and air handler for each story | About $8,000 to $15,000 more |
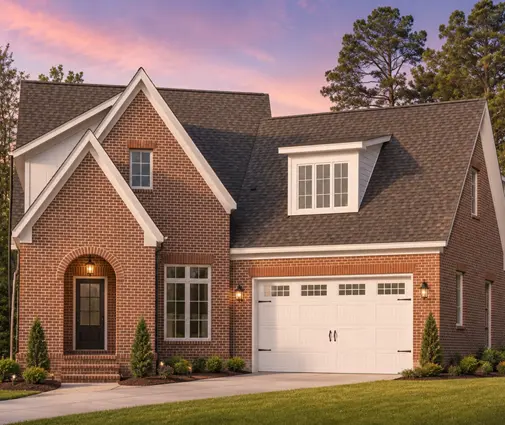
Zoning works best with variable-speed or inverter heat pumps, which can throttle down when only one zone calls for air. For houses over roughly 3,000 sq ft, two systems are common and add redundancy. The 4-bedroom Modern Farmhouse of 3,750 sq ft and the Tudor-style 4-bedroom plan of 3,847 sq ft are both sizes where a contractor may quote either option.

Step 7: Plan returns, transfer paths and fresh air
Supply ducts get attention while returns get forgotten. Bedrooms with closed doors need a way for air to get back to the air handler. That can be a dedicated return, a jumper duct or a transfer grille. Without one, the room pressurizes and the airflow drops. Each floor should have at least one central return, ideally sized in Manual D. Tight new houses also need mechanical ventilation, often an ERV or HRV. Its ducts belong inside too, so reserve space for them in the same chases.
Recent energy codes, wherever they are adopted, generally require a duct leakage test and a blower door test. Ducts that sit entirely inside the envelope are easier to pass with. Ask your building department which edition of the IRC and IECC applies to your lot.
Step 8: Review the plan with this checklist before bids
Hand this list to your drafter or engineer. Confirm each item on the revised drawings before you send them to HVAC contractors, so every bid prices the same house.
- Floor system between stories: open-web trusses specified, with a trunk chase location marked
- Soffit locations drawn on the reflected ceiling plan, with depth noted
- Attic type decided: vented with no ducts, or unvented with insulation at the roof deck
- Air handler closet(s) dimensioned, with a drain, power and filter access
- Return air path from every bedroom
- Zoning approach chosen: one system, zoned system or two systems
- Manual J completed using the final windows and insulation
- Space reserved for ventilation ducts (ERV or HRV)
- Duct leakage and blower door targets stated in the specifications
The 3-bedroom Modern Farmhouse of 3,625 sq ft is a good example of a layout worth running through this list. Generous rooms upstairs mean long branch runs unless the trunk sits centrally.
Timeline at a glance
| Step | When | Typical duration |
|---|---|---|
| 1. Review the plan's mechanical assumptions | Right after choosing a plan | 1 day |
| 2. Manual J, S and D | During plan adaptation | 1 to 2 weeks |
| 3. Floor trusses and soffits | Structural design | 1 to 2 weeks, plus truss lead time |
| 4. Attic strategy | Structural design | Decided in the same review |
| 5. Air handler closet | Floor plan revisions | A few days |
| 6. Zoning decision | With the Manual J results | A few days |
| 7. Returns and ventilation | Mechanical design | About 1 week |
| 8. Checklist review, then bids | Before permit submission | 2 to 4 weeks for bids |
Costs and code requirements vary by state, county and climate zone. Confirm the details with your building department and a local energy rater or mechanical designer before you finalize the drawings.