Thirteen feet, six inches. That is roughly the height of many Class A motorhomes once the roof air conditioners are counted, and it is the number that decides almost everything about an RV garage. A standard 7-foot or 8-foot garage door will not come close, and neither will a typical 9-foot or 10-foot garage ceiling. If you own a coach, a fifth wheel, a travel trailer or a boat on a tandem trailer, the tall bay has to be planned from the first sketch, not added at the end.
This guide walks through the decisions in the order that saves the most money and the most redesign, from measuring the rig to pulling the permit.
Step 1: Measure the rig you have and the one you will buy next
Start with real numbers, not brochure numbers. Measure the overall length bumper to bumper (including a ladder, bike rack or spare tire carrier), the height to the top of the tallest item on the roof, and the width with mirrors folded and extended. For a boat, measure on the trailer, including the tongue, the outboard in the raised position and any tower or bimini frame.
Then add the rig you might own in ten years. Many owners move up from a 30-foot travel trailer to a 38-foot or 40-foot coach, and a garage sized for the smaller one becomes a very expensive regret.
- Time: an afternoon.
- Cost: nothing but a tape measure and a step ladder.
Step 2: Read the HOA covenants and the zoning code before anything else
This is the step people skip, and it is the one that kills projects. Many HOAs ban RVs, boats and trailers parked in view of the street, and some go further and restrict garage door height or the number of front-facing garage doors. Read the CC&Rs and the architectural guidelines, and ask the architectural review committee in writing whether a tall bay is allowed and on which elevation.
Zoning matters too. Residential districts usually cap building height, often somewhere around 30 to 35 feet for the main house, and many codes measure that differently for flat, hip and gable roofs. A tall bay attached to a one-story home rarely hits that limit, but a detached garage can be capped much lower as an accessory structure. Setbacks, lot coverage limits and rules on driveway width also apply. Confirm all of this with your city or county planning office, because the numbers vary a lot from place to place.
- Time: 1 to 3 weeks, mostly waiting for answers.
- Cost: usually free; a pre-application meeting with planning may carry a small fee.
Step 3: Size the door
RV garage doors come in a few common sizes, given as width by height:
- 12x12: enough for many travel trailers, pontoon boats and smaller Class C motorhomes.
- 12x14: the most common choice for Class A coaches and taller fifth wheels.
- 14x14: easier to hit when backing in, and worth it if you will back a trailer in rather than drive a coach straight through.
Leave at least 6 to 12 inches of clearance above the tallest point of the rig. Tires, suspension and a sloped apron all change how high the roof rides when it crosses the threshold. A 14-foot-wide door also forgives a mirror that sticks out a little more than you remembered.
In 2025, an insulated steel 12x14 or 14x14 door with installation typically ran from about $4,000 to $10,000 depending on insulation, windows and wind rating. In hurricane zones, the door needs a design pressure rating that meets local requirements, and a large door is often the weakest point of the whole envelope, so plan for a rated door and its bracing from the start.
Step 4: Set the ceiling height and the opener
A 14-foot door needs more than 14 feet of ceiling. A standard track opener needs room above the door for the curved track and the motor. For a 14-foot door, plan on about 15 to 16 feet of clear ceiling height in the bay. A side-mount jackshaft opener, which sits on the wall next to the door, lets you get by with less headroom and keeps the ceiling clear for lights and storage lifts.
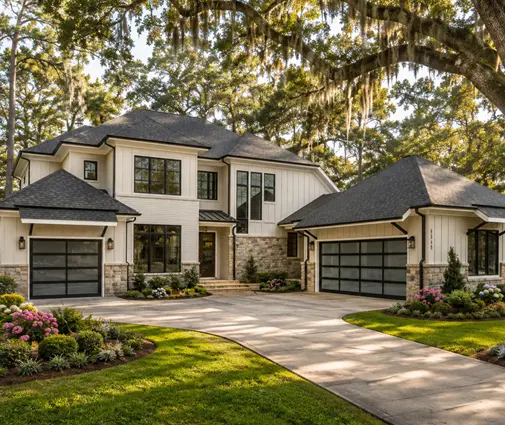
This height drives the roof design. On a one-story ranch or farmhouse, the tall bay usually gets its own roof section, often a taller gable that steps up from the main garage. Done well, it reads as a natural part of the house. Done carelessly, it looks like an afterthought, so ask your designer for the front and side elevations before you approve the layout.
- Cost: a jackshaft opener for a large door often ran about $800 to $1,500 installed in 2025; the taller walls and roof add framing, sheathing and siding that you will see in the bid.
Step 5: Make the bay deep enough and the slab strong enough
For a 40-foot coach, a 45-foot bay is the practical minimum, and 48 to 50 feet is far more comfortable. You need room to walk around the front and back, open the rear storage bay, and park a toad car or a golf cart if you want one. For a boat on a trailer, add 4 to 6 feet beyond the tongue for the same reason.
Width matters as much as depth. A coach with slide-outs is about 8.5 feet wide with slides in, and many owners want to open the slides indoors for cleaning or loading. A bay of 16 to 18 feet gives room to walk past an open door; 20 feet or more lets you open the slides.
A loaded Class A can weigh 25,000 to 40,000 pounds or more. Ask your engineer to size the slab for it; a thicker slab, often 6 inches or more with rebar, and a properly compacted base are common. A 16x50 RV bay adds 800 square feet, and in 2025 a well-built attached tall bay often landed somewhere between $60,000 and $130,000, depending heavily on region, foundation and finishes.
Step 6: Lay out the approach, the turning room and the apron
A big bay is useless if you cannot get the rig into it. A 40-foot coach needs a wide, gentle path from the street, and its turning radius is far larger than a pickup's. Walk the lot with a few stakes and some string, and if possible drive the rig onto the lot before you buy it.
- Front-load bay: the simplest approach. A straight driveway at least 12 feet wide, ideally wider at the street, and a door that faces the approach.
- Side-load bay: keeps the big door off the street elevation, which may be exactly what the HOA wants, but it needs a deep apron in front of the door. For a 40-foot coach, plan on roughly 50 to 60 feet or more of clear apron, and more if you back a trailer in.
- Drive-through bay: a second door at the back lets you pull in and out forward, which is worth a lot if backing a long trailer is not your favorite task. It needs a driveway loop or rear access.
Mind the grade. A steep driveway can scrape the rear overhang of a long coach. Keep the transition into the bay gentle and talk to your civil engineer or grading contractor about the slope. Wider, wider lots and corner lots tend to work best; a narrow suburban lot usually cannot fit a tall bay with a usable apron.
Step 7: Plan the floor drain, the 50-amp outlet and the water
An RV bay is a working space, and small details make it useful.
- Floor drain: a trench drain across the bay near the door, or a slope to the door, deals with snowmelt, rain and wash water. Many jurisdictions do not allow a garage drain to connect straight to the sanitary sewer without an oil and sand interceptor, and some forbid it. Check before you draw it. Budget about $1,500 to $4,000 for a trench drain in 2025.
- 50-amp outlet: most larger coaches use a 50-amp, 240-volt connection, typically a NEMA 14-50 receptacle on a dedicated circuit. Place it near the coach's power inlet, which is usually at the rear on the driver's side, so the cord reaches without strain. Recent editions of the National Electrical Code extend GFCI protection to many 240-volt garage outlets; your electrician will know what your jurisdiction adopted. Expect roughly $800 to $2,500 depending on the length of the run from the panel.
- Water and sewer: a frost-free hose bib for filling the fresh tank and a dump connection outside are common requests; the dump connection needs local approval.
- Light and air: bright LED fixtures high on the walls, plus a ventilation fan if you will run a generator test or a diesel engine inside.
Step 8: Pick a plan and have it adapted
Few stock plans come with a 14-foot door already drawn, so the usual path is to start from a one-story layout with a generous garage wing and have a drafter or architect enlarge it. Look for plans where the garage sits at the end of the house, so it can grow taller and deeper without touching the living areas.
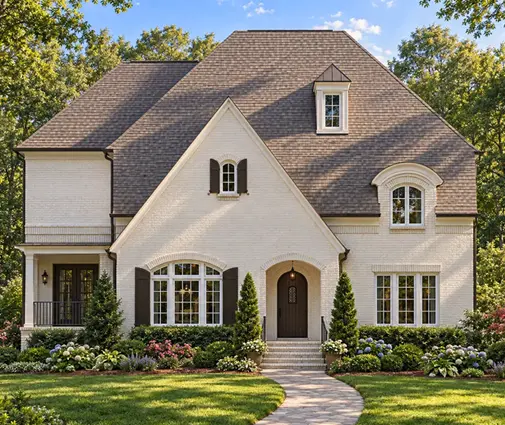
The 3-bedroom farmhouse ranch of 4038 sq ft with a 3-car garage and a shop-style wing is a natural starting point for a tall bay. The 3-bedroom Modern Farmhouse of 2992 sq ft with a 4-car garage already gives you the width to convert one bay. A one-story Modern Ranch of 2951 sq ft with a 3-car garage keeps the garage in a single wing that can be extended at the end.

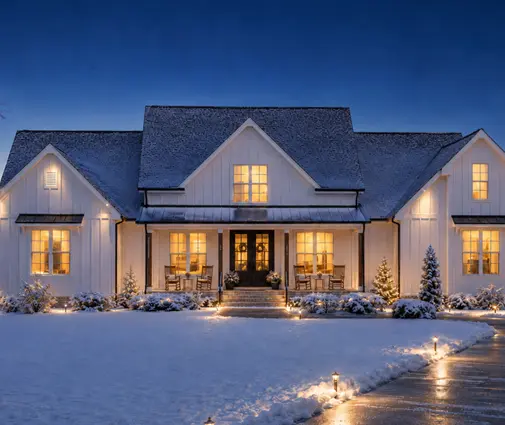

For a smaller budget, the 4-bedroom Craftsman farmhouse of 2508 sq ft with a 3-car garage keeps the living space compact. In the North and Midwest, the 3-bedroom Southern ranch of 2489 sq ft with a basement and a 3-car garage shows how a tall bay can sit on its own slab beside a basement foundation. In hurricane country, the 4-bedroom Florida-style home of 3061 sq ft with a 3-car garage is a good base for a rated big door. Browse more options among house plans with a 3-car garage and ranch house plans.


Have a local drafter or engineer revise the plan to meet the IRC as amended in your area, your wind or seismic zone and your snow load. Then submit for the building permit with the city or county.
- Time: 3 to 8 weeks for revisions, then 2 to 12 weeks for the permit depending on the jurisdiction.
- Cost: plan changes often ran from about $1,500 to $5,000 in 2025, with engineering for the slab, the large door opening and the taller walls adding about $1,000 to $3,000.
Timeline at a glance
| Step | Typical time | Typical cost (2025) |
|---|---|---|
| 1. Measure the rig | 1 day | None |
| 2. HOA and zoning check | 1 to 3 weeks | Usually free |
| 3. Door size | Decided with the plan | $4,000 to $10,000 installed |
| 4. Ceiling and opener | Decided with the plan | $800 to $1,500 for a jackshaft opener |
| 5. Bay depth and slab | Decided with the plan | $60,000 to $130,000 for the whole bay |
| 6. Lot layout and apron | 1 to 2 weeks with a site plan | Grading and paving vary by site |
| 7. Drain, power and water | Built during construction | $2,300 to $6,500 combined |
| 8. Plan revision and permit | 5 to 20 weeks | $2,500 to $8,000 for drafting and engineering |
The figures are typical ranges from 2025 and differ widely by region. Confirm the rules with your local building department and get current bids before you commit to the plan.