It usually happens on a Saturday walkthrough. The framing is up, you stand in the future kitchen, and the pantry suddenly feels too small. You ask the builder to push the wall two feet. On paper that is a drafter's revision. With the studs standing, it becomes a change order with labor, material, a markup, an admin fee, possibly a revised plan for the building department and a re-inspection. The cost depends on how far the build has gone.
Most budget overruns on custom and semi-custom homes do not come from one big surprise. They come from a dozen small mid-build changes. The steps below show how change orders are priced, which changes owners ask for most often, and the cheapest point to make each one.
Step 1: Understand how a builder prices a change order
A change order is a written amendment to your construction contract. It changes the scope, the price and often the schedule. In 2025–2026 most builders build its price from the same parts:
- Direct cost: labor and materials for the new work, plus the cost of tearing out what is already built.
- Markup: overhead and profit. Many builders charge around 10–25% on top of direct cost. Some charge more on small changes.
- Admin or processing fee: some contracts charge a flat fee for every change, often in the low hundreds of dollars, even when the change itself is small.
- Revised drawings: if the change affects structure, egress, plumbing or energy compliance, the drafter or engineer has to update the plans. The city or county may need to review the revision.
- Re-inspection and delay: a failed or repeated inspection can carry a fee. Every week of delay adds construction loan interest, rent if you are living elsewhere, and the builder's general conditions.
A useful rule of thumb is that the same change costs very little at design, more after permit submission, much more after framing, and the most after drywall. Your goal is to make every decision as early in that sequence as possible.
Step 2: Lock the layout while the plan is still a drawing
Time: 2–6 weeks. Cost: a plan revision fee, typically a few hundred to a few thousand dollars depending on scope.
Starting from a stock plan is the cheapest way to build here, because most of the design work is already done. The money you save is lost if you redesign it on the job site. Choose a plan that is already close to how your family lives. Then have a local drafter or engineer adapt it to your lot, setbacks, HOA rules and foundation type before anything goes to the building department.
A single-story layout like this 2112 sq ft modern ranch with 4 bedrooms and 4 baths is easy to evaluate. Every room is on one level, so you can check circulation and furniture placement before any revision fee is spent. Common layout edits at this stage are widening a hallway, flipping the garage, enlarging a mudroom, or turning a flex room into an office. On paper each of these is a redraw. During framing each one becomes tear-out and rebuild.


Step 3: Walk the plan room by room, as if you already live there
Time: 1–2 evenings. Cost: nothing.
Print the floor plan at scale and go through a normal weekday. Where do the kids drop backpacks? Can you carry groceries from the garage to the kitchen without crossing the living room? Does the primary bedroom door swing into the dresser wall? Where will the TV go, and is there an outlet and a low-voltage box there?
Owners most often ask for these changes mid-build:
- Moving or adding interior walls, closets and pantry walls
- Changing door swings, widths or adding pocket doors
- Adding outlets, recessed lights, ceiling fan boxes and data runs
- Upsizing the shower or swapping a tub for a walk-in shower
- Upgrading or resizing windows and patio doors
- Finishing a bonus room or adding a bathroom rough-in
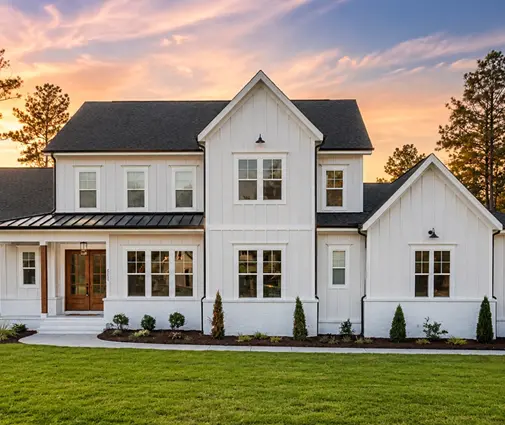
A two-story plan such as this 2589 sq ft Modern Farmhouse with 4 bedrooms and 3.5 baths deserves extra attention at the stairs and upstairs laundry. Moving plumbing on a second floor affects the framing, the ceiling below and sometimes the joist layout.
Step 4: Finalize windows, doors and long-lead items before permit
Time: 2–4 weeks of selections. Cost: no extra cost if done now. A custom order changed later may be non-returnable.
Windows are a typical expensive change. Custom-sized units are often ordered weeks before framing, and many manufacturers will not take back a custom order. If you upgrade after ordering, you may pay for both sets. If you also change a rough opening, the framer has to reframe headers.
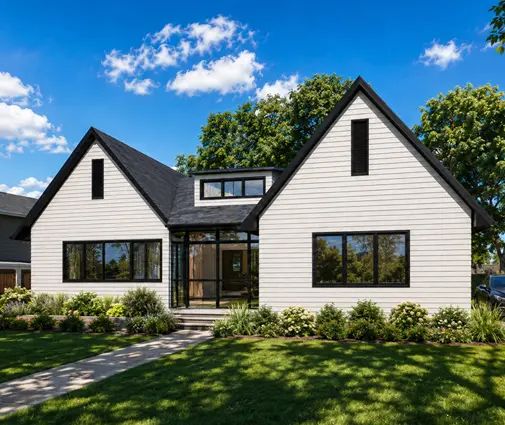
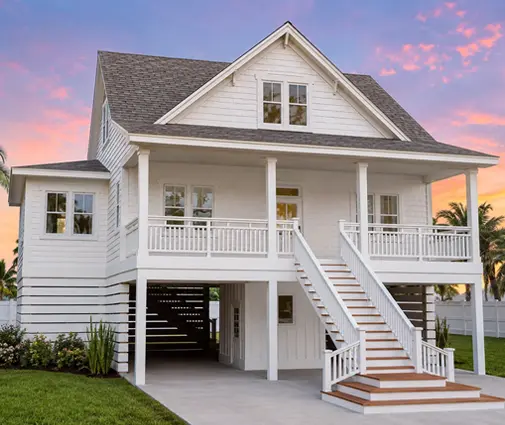
Window-heavy designs like this 2168 sq ft single-story modern home with 3 bedrooms are worth settling early: sizes, grille patterns, frame color, and whether you want sliders or hinged patio doors. In hurricane regions, impact-rated glazing and its approved installation also affect the permit set. A raised coastal plan like this 2412 sq ft, 3-bedroom four-level coastal home shows how much of the exterior is glass, so a later window change affects both the budget and wind-load compliance. If you love light, browse the plans with large windows knowing that these selections need to be final first.
Also lock in appliances, especially ranges, wall ovens and panel-ready refrigerators, because they set cabinet dimensions, gas lines and electrical circuits.
Step 5: Decide on rough-ins for the future now
Time: one meeting with the builder. Cost: usually modest before the slab or framing. Often several times more afterward.
Some features are cheap to prepare and expensive to add. A bathroom rough-in under a slab or in a basement floor costs relatively little before the concrete is poured. After the pour, it means cutting and patching concrete. The same logic applies to an EV charger circuit in the garage, conduit for future solar, blocking for grab bars, and a gas stub-out for an outdoor kitchen.
A plan like this 2109 sq ft Craftsman with 4 bedrooms and a basement is a good example. If you might finish the lower level later, ask for drain and vent rough-ins and a dedicated circuit before the basement floor is poured. You can find more layouts in the basement house plans. The same goes for an unfinished upper room: plans with a bonus room are popular because the space can be finished later, but only if the HVAC, plumbing and electrical are prepared during the main build.

Step 6: Write the change-order rules into the contract
Time: part of contract review. Cost: possibly a short attorney review fee.
Before you sign, make sure the contract explains:
- That every change is written, priced and signed before the work starts, with no verbal approvals on site.
- The markup percentage and any flat admin fee per change.
- How schedule extensions are calculated and who pays for re-inspections and plan revisions.
- How allowances work (flooring, lighting, tile), and what happens when you go over them.
- Whether credits for deleted work are passed back at the same rate.
If you have a construction loan, ask your lender how change orders are handled. Larger changes may need lender approval and can affect the appraisal and draw schedule.
Step 7: Use the pre-drywall walkthrough as your last cheap checkpoint
Time: 2–3 hours on site. Cost: small changes are still affordable here.
After framing, mechanical rough-ins and the rough inspections, but before insulation and drywall, walk every room with the plan in hand. Check outlet and switch locations, the heights of vanity lights, shower valve positions, blocking for TVs and towel bars, and data and speaker wire. Moving a box now costs relatively little. After drywall, the same move means cutting, patching, texture and paint.
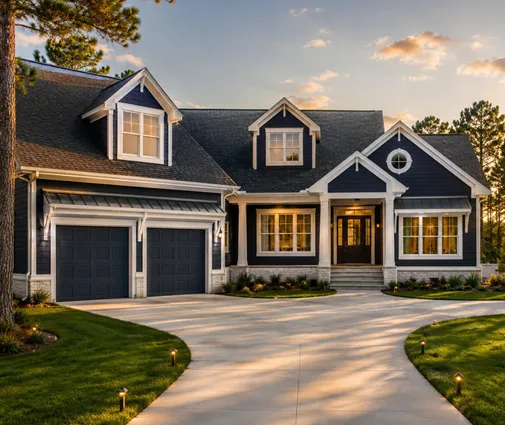
On a larger home like this 4200 sq ft Modern Farmhouse with 4 bedrooms and a 3-car garage, budget extra time. More rooms mean more boxes, more circuits and more chances for a missed detail.
Step 8: If you must change something, batch it and get the price first
Time: a few days for pricing. Cost: varies.
Changes will still happen, so handle them deliberately. Combine several small requests into one change order so you pay one admin fee and one trade visit. Ask for the price and the schedule impact in writing before approving. Ask whether the change requires revised drawings or a new inspection. Sometimes a cosmetic alternative, such as a different finish, gives you most of what you wanted without touching the structure.
Timeline: when each change is cheapest
| Build phase | Typical timing | Changes still cheap | Changes that get expensive |
|---|---|---|---|
| Plan selection and adaptation | Months 1–2 | Layout, room sizes, walls, garage, stories | Almost nothing |
| Selections, before permit submission | Months 2–3 | Windows, doors, appliances, fixtures, rough-ins | Major layout changes may need new engineering |
| Permit review | Weeks to a few months, depending on jurisdiction | Finishes, allowances | Anything that requires resubmission |
| Foundation | Weeks 1–4 of construction | Framing details, finishes | Under-slab plumbing, basement layout |
| Framing | Weeks 4–10 | Box locations, blocking | Walls, openings, window sizes, stairs |
| Rough-ins and pre-drywall walkthrough | Weeks 10–14 | Outlets, switches, lights, low-voltage | Plumbing relocation, HVAC changes |
| Drywall to finishes | Weeks 14–28+ | Paint colors, hardware | Almost anything behind a wall |
Durations vary widely with region, weather, permit backlog and the size of the home, so check the actual schedule with your builder and the current permit timelines with your city or county. The lesson stays the same: the cheapest change order is the one you never have to sign. Make the decisions while the house is still on paper.