One mistake comes up again and again. A family moves into a new ranch in Texas or Arizona, spends the first spring outside, and decides it wants a grill island and a ceiling fan on the patio. By then the slab is finished, the stucco is up and the yard is sodded. Running a gas line means trenching across the lawn. Adding a 20-amp circuit means cutting drywall. A cover for the patio has to be bolted to a fascia that was never designed to carry it.
All of that is avoidable. In the South and the West, where people use the backyard for eight to twelve months a year, the outdoor space deserves the same attention as the kitchen. The steps below follow the order a builder or drafter would want to see those decisions in.
Step 1: Read the lot before you read floor plans
Stand on the site at different times of day, or ask your surveyor for a site plan showing north. A patio facing west in Phoenix or Las Vegas bakes from 3 p.m. until sunset. In Florida or along the Gulf the issue is more often humidity and summer storms than sun. North and east exposures usually give the most comfortable afternoons in hot climates. In the high desert or Northern California the answer may be the opposite, because you want winter sun.
Also note the slope, where water drains, the views you want to keep and the neighbors you want to screen out. Check the setbacks and lot coverage limits too. In some cities and HOAs a roofed patio counts toward coverage while an open slab does not.
Time: one to two weeks. Cost: nothing if you already have a survey. A boundary and topographic survey ran roughly $600 to $2,000 in 2025, depending on the region and lot size.
Step 2: Pick a plan where the living spaces face the yard
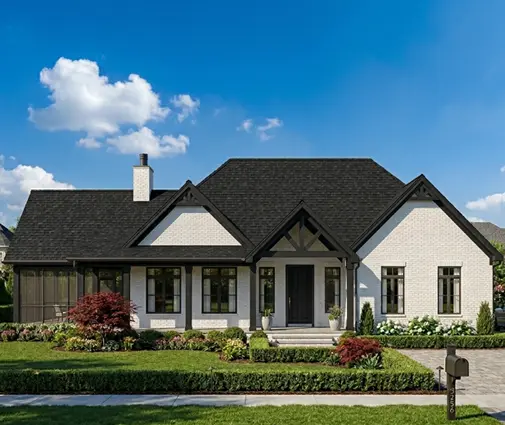
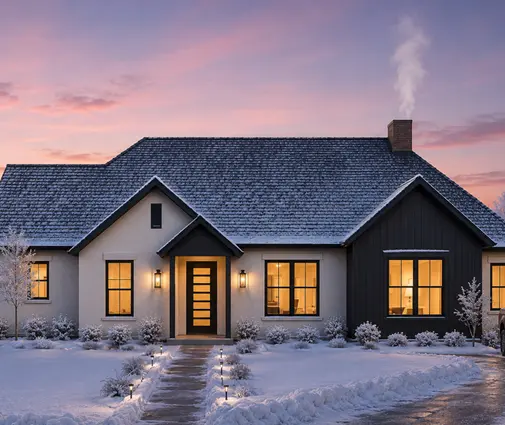
Single-story plans make this easier, since every main room sits at grade. Look for a great room, kitchen and dining area lined up along the rear wall, with bedrooms pushed to the sides. The one-story collection is a good place to start. Then filter for plans with a rear view kitchen, so whoever is cooking can see the yard.
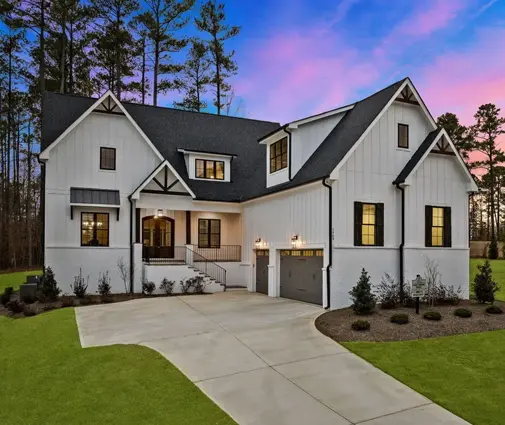
A good example is this 2,168 sq ft Modern Farmhouse with three bedrooms. Its open living core sits on the back of the house, and the two-car garage stays out front. For a slightly larger family, a 2,600 sq ft four-bedroom modern ranch uses the same idea in a wider footprint.
Time: two to four weeks of browsing and shortlisting.
Step 3: Put the patio where the cooking happens
Many plans center the patio on the great room because it looks balanced on paper. In daily life, though, food, plates and ice travel from the kitchen. When the patio door sits a few steps from the sink or island, people use the patio every day. When it sits across the house, it gets used on holidays.
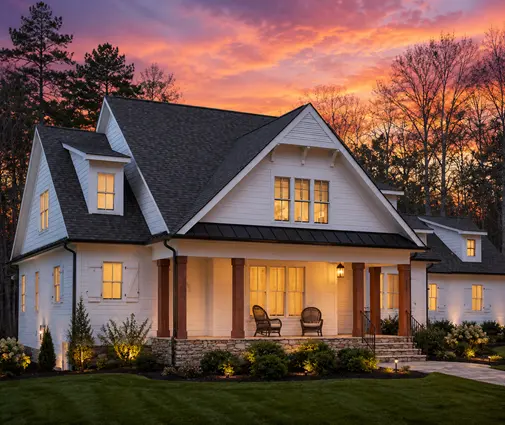
Aim for a short, straight path from the fridge to the outdoor counter. Keep it under 20 feet if you can, with no furniture in the way. A pass-through window or a hinged counter-height window over the kitchen sink is a cheap addition at the framing stage. This 2,250 sq ft Modern Craftsman ranch with three bedrooms shows the logic, with kitchen, dining and rear porch grouped together.
Cost: moving a door or patio on a stock plan is a routine change. In 2025 a drafter typically charged a few hundred to about $2,500 for this kind of revision, depending on how much of the roof is affected.
Step 4: Choose the glass wall
The opening is what turns two separate spaces into one room. There are three common options.
- Multi-slide doors. Several panels slide and stack behind one another, or disappear into a wall pocket. They suit wide openings of 12 to 24 feet and keep a clean look when closed.
- Folding (bi-fold) doors. Panels fold accordion-style to one or both sides, so almost the whole width opens. Expect more frame lines when closed and more hardware to maintain.
- French or standard sliding doors. These are the budget option. A pair of 8-foot sliders on each side of a fireplace can still feel generous.
Make these decisions before framing starts:
- Header. A 16-foot opening in a bearing wall needs an engineered beam.
- Pocket. A pocketing door needs extra wall length beside the opening.
- Track. If you want a flush, step-free track, the slab must be recessed at the threshold, and that has to be on the foundation plan.
- Impact rating. In hurricane-prone counties of Florida, the Gulf and the Carolinas, glazing usually must be impact-rated or protected. That adds cost, so confirm the requirement with your building department.
Cost: as a rough 2025 range, a quality 12 to 16-foot multi-slide or folding unit cost about $8,000 to $25,000 installed. Large impact-rated or aluminum thermally broken systems can cost more. Lead times of 8 to 16 weeks are common, so order early.
Step 5: Decide between a roof-integrated cover and a pergola
A covered patio framed as part of the main roof is the most durable choice and usually the best-looking one. It shares the trusses or rafters, the shingles or metal and the gutters. It also gives you an outdoor ceiling for fans and lights, and it sheds rain. The trade-off is less daylight in the rooms behind it. A deep cover of 14 to 16 feet can darken a great room, so consider clerestory windows, a vaulted ceiling inside or skylights in the cover.
An add-on pergola is cheaper and lets in filtered light, but plain wood slats give no rain protection. Louvered aluminum pergolas close up when it rains but cost far more. Either way, an attached structure needs proper ledger connections, and in high-wind zones it needs uplift calculations.
The 1,879 sq ft Acadian Low Country plan with three bedrooms is a classic Southern answer: deep porches under the main roofline. In the West, this 3,765 sq ft California-style home with four bedrooms and a three-car garage wraps its outdoor rooms under broad modern roof planes.
| Option | Typical 2025 cost | Rain cover | Notes |
|---|---|---|---|
| Roof-integrated covered patio | roughly $35–$80 per sq ft added to the build | Yes | Best value if done during construction |
| Wood pergola, add-on | about $4,000–$15,000 | No | Needs sealing; light shade only |
| Louvered aluminum pergola | about $15,000–$45,000 | Yes, when closed | Motorized; check HOA approval |
Step 6: Rough in the outdoor kitchen now, even if you build it later
This is the cheapest insurance in the whole project. Even if the grill island is three years away, ask for these stubs before the slab or patio pour:
- Gas. A capped natural gas or propane line at the future grill location, sized for a grill plus a possible side burner or heater.
- Water. A cold supply line, plus hot water if you want a real prep sink. Use a freeze-proof valve in areas with winter frost.
- Drain. A waste line for the sink, which is the hardest item to add later.
- Power. At least one dedicated 20-amp GFCI circuit for the counter, plus a separate circuit for a fridge or ice maker.
- Ceiling and conduit. Fan-rated boxes in the patio ceiling and an empty conduit for speakers, a TV or cameras.
The outdoor kitchen collection shows plans that already lay this out. This 2,508 sq ft four-bedroom Modern Craftsman ranch is a good candidate for adding one.
Cost: in 2025, stubbing out gas, water, drain and two circuits during construction often totaled roughly $1,500 to $4,500. Doing the same work after landscaping and hardscape can easily cost two or three times as much.
Step 7: Get the floor right at the threshold
Getting the levels right is what makes the transition work. Indoors, the finished floor is usually a few inches above the patio. With a flush track, the patio is set just below the interior floor and slopes away from the house. A fall of about 1/8 to 1/4 inch per foot is common practice. A trench drain at the door adds protection in heavy-rain regions.
Using the same tile or a similar porcelain color inside and out makes the room feel continuous. Pick an outdoor-rated, slip-resistant finish.
Time: decided during design, built with the slab and flatwork.
Step 8: Add comfort for the hot months
Shade alone is not enough in July in Houston or Tucson. Plan for these items early, because each one needs wiring or blocking in the framing:
- Ceiling fans
- Recessed motorized screens, which also keep mosquitoes out in the Southeast
- Infrared heaters for winter evenings
- A wall for an outdoor fireplace or a TV
Mid-century designs handle this especially well. This 1,862 sq ft three-bedroom mid-century modern home pairs low rooflines and generous glass in a way that suits desert lots.


Step 9: Adapt the plan and get it permitted
Hand your list to the local drafter or engineer who will adapt the stock plan. That list should cover door sizes, the patio depth, cover framing, the slab recess and every stub-out. They will check it against the IRC as adopted by your city or county, local wind and seismic requirements, and energy rules for large glazed areas. Submit the design to your HOA's architectural committee at the same time, since its review can run in parallel with the permit.
Time: three to eight weeks for revisions and engineering. Permit review varies widely, from a couple of weeks to a few months. Cost: engineering for beams and uplift ran roughly $500 to $2,500 in 2025. Always confirm current requirements with your building department.
Timeline at a glance
| Step | When | Typical duration |
|---|---|---|
| Study the lot, sun and setbacks | Before choosing a plan | 1–2 weeks |
| Shortlist plans with rear living spaces | Design phase | 2–4 weeks |
| Place patio by the kitchen, size the opening | Design phase | 1–2 weeks |
| Choose cover type; order glass doors | Before permit submission | 1 week; doors 8–16 weeks lead time |
| Plan modifications and engineering | Pre-permit | 3–8 weeks |
| Permit and HOA review | Pre-construction | 2 weeks to 3+ months |
| Underground stub-outs and slab recess | Before slab pour | A few days |
| Cover framing, wiring, fan boxes | Framing and rough-in | Part of the main schedule |
| Patio flatwork, finishes, outdoor kitchen | Final months or later | 1–4 weeks |
Do the thinking in this order and the backyard becomes part of the house instead of an afterthought you pay for twice.