The framing crew pulls onto your lot at 7 a.m. with three nail guns, two compressors and a chop saw. The slab is cured, the lumber package is stacked, and the only power on site is a rented generator that runs out of fuel by lunch. It happens on new builds every week, and the cause is almost always the same: nobody called the electric utility early enough.
Getting electricity to a building site involves two separate tracks. One is the temporary service, a temp pole or pedestal that your electrician sets, the city or county inspects, and the utility energizes. The other is the permanent service and, on many rural or newly divided lots, a line extension from the nearest pole or transformer. Each track has its own paperwork, its own crews and its own queue. The checklist below puts them in order.
Stage 1: Before You Close on the Lot
- Distance: measure from the nearest pole, pad-mount transformer or pedestal to where the house will sit. A lot 80 feet from a transformer and a lot 1,200 feet down a gravel road are two very different budgets.
- Provider: confirm which utility serves the parcel. Near county lines, it can be an investor-owned utility, a municipal system or a rural electric cooperative, each with its own rules and fees.
- Capacity: ask whether the existing transformer can carry another house or will need to be upgraded.
- Easements: check the plat and title work for utility easements. If the line has to cross a neighbor's land, someone has to sign an easement before the utility will build.
- HOA rules: many subdivisions require underground service and restrict where meters and pedestals can go.
Advice: call the utility's new-construction line before you buy, not after. Most will give a rough idea of what is involved over the phone, and some will send a field representative. If the answer is "line extension plus easement," get a written estimate and treat it as part of the land cost.
Stage 2: The Service Application and Load Letter
- Load calculation: your electrician or designer works out the expected demand from the plans: square footage, HVAC tonnage, range, dryer, water heater, well pump, EV charger, pool.
- Service size: 200 amps covers most single-family homes. Large houses with several HVAC systems, all-electric heat or a shop often go to 320 or 400 amps.
- Site plan: the utility wants a drawing showing the house footprint, the driveway, the meter location and the proposed route of the service.
- Load letter: some utilities issue a "will-serve" or load letter confirming they can supply the requested load. Lenders and permit offices sometimes ask for it.
- Meter location: choose it early. It affects the panel location, the trench route and how the house looks from the street.
Advice: the plan you choose sets the load. A compact design like this 1,879 sq ft single-story Acadian ranch with 3 bedrooms sits comfortably on a 200-amp service. A house like this 6,261 sq ft three-story Modern Farmhouse with a 4-car garage probably calls for a heavier service and a conversation with the utility about the transformer. If you plan an EV charger in the garage, include it now. Adding it later can mean a new service upgrade.



Stage 3: Overhead or Underground, and What the Extension Costs
- Overhead service: a drop from the pole to a mast or the house. It is usually cheaper and faster where poles already run along the road.
- Underground service: conduit in a trench to a meter base on the house. It is required in most newer subdivisions and preferred for looks and storm resilience.
- Trenching responsibility: find out who digs, who supplies conduit and who inspects the trench before it is backfilled. Many utilities make the owner provide the trench and conduit to their specification.
- Footage allowance: many utilities include a set length of line or a dollar credit for a new residential service and charge for anything beyond it.
- Extension charge: the excess is billed as a contribution in aid of construction, often paid upfront before the work is scheduled.
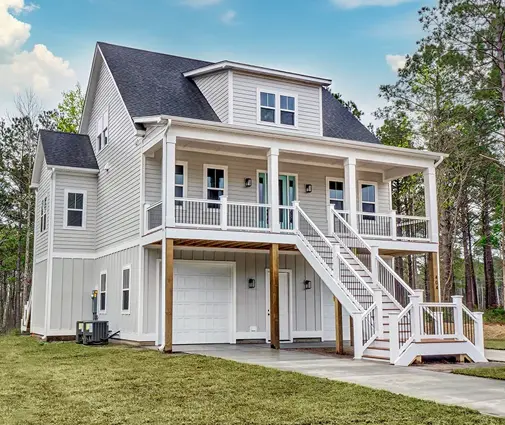
Advice: as of 2025–2026, a short service drop on a subdivision lot often costs little or nothing beyond the connection fee. A long rural extension is another matter. Quotes in the range of $10 to $30 per foot for overhead line and $20 to $60 or more per foot for underground are common, and a new transformer can add several thousand dollars. A 1,000-foot run can reach $15,000 to $50,000. These figures vary widely by utility and terrain, so rely only on the written estimate. In the North and Midwest, where houses like this 2,109 sq ft Craftsman ranch with a basement are common, frost and rock can raise trenching costs. On coastal lots, flood rules can set the meter height on raised homes such as this four-level 2,215 sq ft beach house.
Stage 4: The Temporary Service Permit and Inspection
- Permit: a licensed electrician (or, in some jurisdictions, the owner-builder) pulls a temporary service permit from the city or county building department.
- Temp pole or pedestal: it is set close enough to the utility source to meet the utility's maximum distance, often within a span of the pole or next to the transformer.
- Equipment: a meter base, a main disconnect, GFCI-protected receptacles and a grounding electrode. Requirements follow the NEC as adopted locally, so ask your electrician which edition applies.
- Inspection: after the inspector approves the setup, the building department releases it to the utility, which then installs the meter and energizes it.
- Account: open an electric account for the temp service in the builder's or owner's name. Some utilities will not energize until a deposit is paid.
Advice: the inspection usually takes a day or two to schedule. The wait for the utility to energize after release can be anywhere from a few days to several weeks in a busy season. If your temp service has to be fed from a line extension that doesn't exist yet, budget for a generator and get it in writing who pays for the fuel.


Stage 5: The Timeline, Counted Back From the Pour
- 12 to 16 weeks before the foundation: submit the service application and site plan, and request the extension estimate.
- 8 to 10 weeks: pay the extension charge, sign easements and confirm the utility's design.
- 4 to 6 weeks: the electrician pulls the temporary permit, and the trench route is staked.
- 2 to 3 weeks: the temp pole is set and inspected and the release is sent to the utility.
- Foundation week: the temp service is live, and underground conduit to the house location is in place before the slab or backfill.
Advice: for a large build like this 5,180 sq ft French Country home with 4 bedrooms, or a design with a big shop wing, add a few weeks for engineering at the utility. A plan with a 3-car garage and an EV charger may change your service size, so settle the load before you apply. On a tight lot in a finished subdivision, a simple one-story plan like this 2,250 sq ft Modern Craftsman ranch can sometimes be powered in a few weeks. Still, start the application as soon as the plans are final.
The Most Common Mistakes
- Calling the utility after the permit is issued instead of before closing on the lot.
- Setting the temp pole too far from the utility source, so the inspection passes but the utility refuses to connect.
- Pouring the slab or backfilling before the service conduit is in.
- Underestimating the load and paying for a service upgrade a year later.
- Leaving the extension charge out of the construction loan budget.
- Assuming overhead service is allowed when the HOA or the utility requires underground.
Rules, fees and lead times differ from one utility and county to the next. Confirm the current requirements with your utility, your building department and a licensed electrician before you set your schedule.



