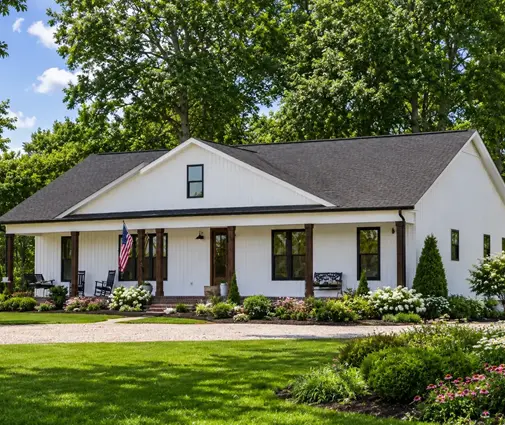
Many basements are finished with a stud wall, fiberglass batts and plastic sheeting pressed against the concrete. A few years later, the bottom plate is black, the drywall smells, and the whole wall has to come out. This happens because those choices were made after the foundation was poured, when the cheap options were already gone. A basement in a new house is the one part of the envelope you can insulate well for little money, but only if you plan it before the excavator arrives. The checklist below follows the order in which the decisions have to be made.
Stage 1: Know what your climate zone and the code require
- Climate zone. Look up your county on the IECC climate zone map. Zones 1 and 2 (the Gulf Coast, Florida, southern Texas) generally have no basement wall requirement. Zones 3 through 8 do, and the requirement gets stricter as you go north.
- Code edition. Ask the building department which IRC or IECC edition it enforces and what local amendments it has. Many jurisdictions adopt a code years after it is published, and some weaken or strengthen the energy chapter.
- Wall R-value. Under recent IRC editions, typical prescriptive values are roughly R-5 to R-10 of continuous insulation (ci) in zones 3 and 4. In zones 5 through 8, they are R-15 ci, R-19 in a cavity, or R-13 cavity plus R-5 ci. Confirm the exact numbers for your edition.
- Conditioned or not. If the basement is inside the thermal envelope, which is the usual case when you plan to finish it, the walls are insulated. If it stays unconditioned, the floor above it is insulated instead. The second option is rarely a good idea when you have ducts and a water heater down there.
- Compliance path. Prescriptive tables are only one route. A performance (REScheck or energy model) or ERI path can trade a thinner basement wall for better windows or air sealing.
Put the chosen R-values and their locations on the foundation drawing before you apply for the permit. A stock plan is usually drawn to a generic foundation, and the local engineer or drafter who adapts it is the right person to write in the insulation spec. If you are still choosing a design, browse house plans with a basement and assume that every one of them will need this local adaptation.
Stage 2: Choose where the foam goes on the walls
- Exterior rigid foam. XPS or EPS board goes on the outside of the foundation before backfill. It keeps the concrete warm and dry, and it leaves the inside free for finishing. The weak points are the exposed strip above grade, which needs a protective coating or flashing, and termite concerns in some southern states, where codes may restrict foam below grade.
- Interior foam plus stud wall. Rigid foam is glued or fastened tight to the concrete with taped seams, and a 2x4 wall is framed in front of it. This is the most common approach for owners who will finish later, and it is easy to inspect.
- Closed-cell spray foam. It is sprayed directly onto the concrete or between studs held off the wall. It air-seals and blocks vapor in one step, but it costs more per R-value than board foam. In 2025, installed prices often ran several dollars per square foot of wall at code thickness.
- Insulated concrete forms (ICF). Foam blocks are filled with concrete, so insulation sits on both faces. The wall usually costs more than a plain poured wall, sometimes 10 to 25 percent more for the foundation, but it can save a separate insulation trade.
- Drainage and dampproofing. Whatever you choose, it needs footing drains, a dampproofing or waterproofing membrane, and grading away from the house. Insulation does not replace any of these.
For a house you will finish in stages, interior foam board with a later stud wall is usually the most forgiving choice. Exterior foam is excellent but adds a step on a tight foundation schedule. Pick one approach, write it into the plan, and tell the concrete contractor before forms go up. This matters most for single-level homes such as this 3-bedroom contemporary one-story of 1906 sq ft, where the basement can nearly double the living space and its walls are a large share of the envelope.


Stage 3: Decide about the slab before the gravel goes in
- Under-slab foam. Recent IRC editions typically require slab insulation only for slabs within about 12 inches of grade, so a deep basement floor often has no prescriptive requirement. Even so, 1 to 2 inches of rigid foam under a basement slab is cheap insurance against a cold, damp floor.
- Heated floor. If you plan radiant tubing, insulation under the whole slab is generally required, often R-5 or more under recent editions. It is also the only way to keep the heat from going into the ground.
- Vapor retarder. A 10-mil or thicker polyethylene or reinforced sheet goes directly under the slab, with taped seams and turned up at the walls. This is what keeps the floor from wicking moisture into carpet or wood flooring later.
- Radon. Ask whether your county is in a high-radon area. A sub-slab vent pipe roughed in now costs little compared with retrofitting a system later.
- Edge break. A strip of foam between the slab edge and the foundation wall stops a cold perimeter where the slab meets the wall.
Under-slab foam is the one item you can never add later without breaking concrete, so decide on it at the planning stage, not at the pour. On a plan like this Ranch of 2489 sq ft with a 3-car garage, the basement floor area is large, and warm flooring there decides whether the space becomes a real family room or stays storage.
Stage 4: Seal and insulate the rim joist
- Air sealing first. Caulk or foam the gap between the sill plate and the foundation, and use a sill gasket under the plate. The rim area is one of the leakiest spots in a typical wood-frame house.
- Closed-cell spray foam or cut-and-cobble. Spray foam in each joist bay is fastest. Rigid foam pieces cut to fit and sealed with canned foam at all edges work too and cost less.
- No bare fiberglass. A batt stuffed against the rim lets warm, humid air reach the cold wood, and that wood can rot or mold.
- Continuity. The rim insulation must connect to the wall insulation below and the air barrier above, with no gap at the top of the foundation.
- Inspection. Many jurisdictions check rim insulation and air sealing at the insulation inspection, and a blower-door test is common under recent codes.
The rim joist is a small area, but it is where most finished basements feel drafty. Multi-story plans have a rim at every floor level. On a 3-story Modern Farmhouse of 2082 sq ft with 4 bedrooms or a 5-bedroom Colonial-Craftsman of 2853 sq ft on three levels, ask the builder to treat each rim the same way as the basement one.


Stage 5: Build the finished wall so it never has to come out
- Foam against concrete. Concrete must touch only foam or a material that tolerates moisture, never fiberglass, paper or wood.
- Pressure-treated bottom plate. Use a treated plate on a sill gasket or foam strip, so the wood does not sit directly on the slab.
- No polyethylene on the inside. Interior plastic sheeting traps moisture between itself and the cold wall. Foam plus unfaced batts and painted drywall let the wall dry inward.
- Gap for services. Leave a small space between the studs and the foam, or use 2x4s flat, so wiring does not cut the foam board.
- Dehumidification. Plan for a supply duct or a dehumidifier. Even a well-insulated basement can stay humid in summer in the Midwest and Northeast.
The goal is a wall that stays above the dew point on its inner face. Foam does that and fiberglass does not. If the foam layer goes in during construction, finishing later is only framing, drywall and trim. That is welcome on mid-size plans such as this 3-bedroom Craftsman of 1764 sq ft or the Modern Farmhouse of 3590 sq ft with 4 bedrooms and a 3-car garage, where the basement is planned as bonus living space.
The most common mistakes
- Fiberglass batts pressed directly against concrete, often with plastic sheeting on the inside: the classic mold wall.
- Skipping under-slab foam to save a few hundred dollars, which leaves a cold floor that can never be fixed cheaply.
- Leaving the rim joist uninsulated or stuffed with fiberglass.
- Insulating a wet foundation instead of fixing drainage, grading and gutters first.
- Not checking the local code edition, then failing the insulation inspection or the blower-door test.