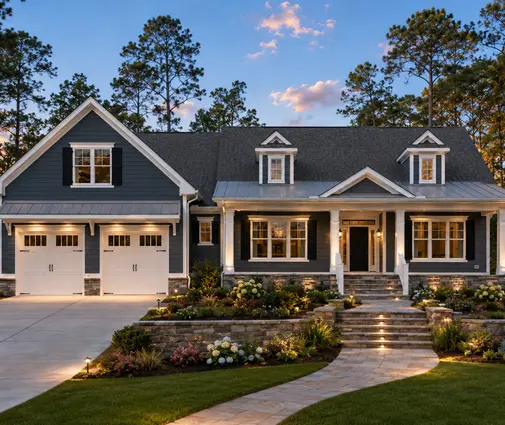
The most common curbless shower mistake happens months before anyone picks a tile. The slab gets poured flat, or the floor joists go in at the same height as the rest of the floor, and the "zero-threshold" shower on the plans turns into a 2-inch step or a ramp of mortar at the bathroom door. A curbless walk-in shower looks simple on a drawing. To build it, the floor has to drop where the shower goes, and that drop has to be planned at the foundation or framing stage. The ideas below show how builders handle it in different kinds of American homes. Each one is tied to a plan where the approach fits.
1. Recess the slab right where the shower sits
On a slab-on-grade house, the cleanest solution is a recess formed into the concrete before the pour. The plumber sets the drain body at its final height, and the concrete crew forms a box lower than the surrounding slab. The depth depends on the system. A traditional mortar bed needs more depth. A foam sloping kit with a bonded membrane needs less, often in the range of 1 to 2 inches. The slab drawings should show the recess, its exact location and its depth, and the foundation crew needs those numbers before the pour.
A single-level contemporary home like this 3,730 sq ft one-story plan with four bedrooms and 5.5 baths is a natural candidate. With that many bathrooms on one slab, deciding which showers go curbless early keeps the pour simple: one recess for each, located off the plan dimensions, not guessed in the field.
2. Drop the whole bathroom floor, not just the shower
A shower-only recess leaves a visible transition where the sloped shower floor meets the flat bathroom floor. Many builders prefer to recess the entire bathroom slightly and slope the whole room gently toward a linear drain at the back wall of the shower. The tile then runs continuously from the doorway to the drain. There is no curb, no threshold strip and no change in pattern.
This works especially well in homes planned for aging in place. This 2,764 sq ft single-story French Country plan with two bedrooms and 3.5 baths reads like a house meant to be lived in for decades, and a fully recessed owner's bath means a walker or a wheelchair rolls straight in. Browse more one-story house plans if a no-step home is the goal.



3. Over a basement, drop the joists
A slab recess is not an option when the main floor is framed over a basement. The fix here is in the floor framing. Under the shower area, the framer sets the joists lower in hangers, or uses shallower joists sized by the engineer. The finished shower floor then sits below the rest of the subfloor. Solid-sawn joists can sometimes be notched within limits, but the IRC restricts notch depth and location. Engineered I-joists generally cannot be notched at all. Either way, it is a conversation for the drafter or engineer adapting the plan, not a decision for the tile setter.
This 1,906 sq ft one-story transitional plan with a basement is a good example. The owner's bath sits over open basement framing, so the dropped section can be drawn in before the lumber is ordered. Explore more house plans with a basement in northern and Midwestern climates.
4. Coordinate the upstairs bath with the floor framer
On a two-story home, a curbless shower upstairs needs the same dropped framing, plus one more check: what is below it. A lowered joist section can affect the ceiling height of the room underneath, or clash with ductwork and plumbing runs. Some builders sidestep the issue by raising the rest of the second floor slightly with a thicker subfloor or a sleeper layer. Others choose deeper floor trusses so there is room to drop the bathroom area without touching the ceiling below.
If the owner's suite or a secondary bath goes upstairs in a home like this 3,062 sq ft two-story Modern Farmhouse with four bedrooms, mark the curbless shower on the framing plan early. Floor truss manufacturers can design a dropped bay into the layout, but only if they know about it before they build the trusses.
5. In elevated coastal homes, everything is framed
Raised homes in hurricane and flood zones usually have no slab under the living spaces at all. Every bathroom sits on framed floors, often with engineered lumber sized for high wind loads and strict nailing schedules. Dropping joists there needs the engineer's sign-off. So does any change to how loads reach the piles or the walls below.
This 2,649 sq ft three-story Low Country cottage with three bedrooms shows the type well. When the living levels are lifted, a curbless shower is still achievable. But it belongs in the structural drawings from day one, together with a waterproofing system that tolerates the movement of a wood floor.
6. Choose sheet or liquid waterproofing before you order tile
Under the tile, two families of systems dominate new construction:
- Sheet membranes are bonded to the substrate with thinset, with factory-made corners and seams overlapped and sealed. Their thickness is consistent because it comes from the factory, and the inspector can see the seams. They take more care at corners and around the drain flange.
- Liquid-applied membranes are rolled or troweled on in two or more coats, usually with fabric reinforcement at seams and changes of plane. They flow easily around niches, benches and odd shapes. Their weakness is thickness: too thin and the coat does not protect. Good installers check each coat with a wet-film gauge.
Both can work well when they are listed for shower use, often under the ANSI A118.10 standard, and installed by the manufacturer's instructions. The real rule is not to mix brands across the drain, membrane and sloping system unless the maker approves the combination. In a large home with several showers, like this 4,452 sq ft Modern Farmhouse with a basement and 5.5 baths, using one system for every bath keeps details consistent and makes inspections easier.



7. Slope everything to a linear drain
A center drain needs four slopes meeting at one point, which makes large-format tile hard to lay on a curbless floor. A linear drain at the back wall or the entry needs only one plane, sloped in one direction. Builders commonly aim for about 1/4 inch per foot toward the drain. Confirm the allowed range with the local inspector, since the IRC and local amendments set limits. In 2025 the drain itself typically ran a few hundred dollars, more for tile-in or custom-length models, before labor. The single slope also makes it easy to bring the slope out of the shower and across part of the bathroom floor.
The rambling layout of this 2,836 sq ft Ranch-style plan with three bedrooms and three full baths gives each bath a clean back wall, which is the natural home for a linear drain.
8. Flood test before tile hides the work
Once tile goes down, the waterproofing is invisible. The time to check it is right after the membrane cures. Plug the drain, fill the shower area to just below the top of the membrane, mark the water line and leave it, commonly for 24 hours. If the level holds and nothing shows up below, the pan is sound. Many jurisdictions require a shower pan inspection at this stage. Ask the building department whether yours does, and schedule it so the tile setter is not waiting. Photograph the drain connection, the corners and the test before anything gets covered.
It is a small step that matters most in larger homes with several wet areas. In a house like this 3,651 sq ft two-story Modern Farmhouse with four bedrooms, testing each bath before tile protects the finished ceilings below.
A curbless shower is less about tile and more about sequence. Decide which showers go curbless, put the recesses or dropped framing on the drawings, pick one waterproofing system and test it before anything covers it. Get those four steps right on paper, and the flush, open bathroom you wanted is what the crew builds.