The most expensive revision on a stock house plan is often not the big one. It is the third email that says "oh, and one more thing." Each new request after the drafter has started can trigger another round of revisions, another invoice and another week of waiting before you can submit for a permit. The fix is not to make fewer changes. It is to mark them up once, clearly, in the right order.
Here is a step-by-step process for homeowners modifying a stock plan with a drafter, a residential designer or the original plan designer, from the first redline to the final sign-off.
1. Live with the plan before you draw on it
Print the floor plans at a readable scale and walk through a normal weekday on paper: groceries from the garage to the kitchen, laundry from the bedrooms to the washer, kids' shoes and backpacks at the back door. Mark every friction point in pencil first. Many changes people think they want disappear after this exercise, and a few they never considered show up.
Bring your builder in at this stage if you already have one. A builder who works your area knows what the local building department flags, what your lot allows and which changes cost real money. Ten minutes of their input before the redlines saves hours afterward.
2. Redline the PDF the way a drafter reads it
Use any PDF markup tool and stick to a few conventions drafters recognize:
- Red for changes, blue or green for questions and clarifications.
- Cloud every change and tag it with a number that matches your written change list.
- Write dimensions, not adjectives. "Extend garage 4'-0" toward rear" beats "make garage bigger."
- Mark the change on every sheet it affects, or at least note "see also elevations, roof plan."
- Cross out what goes away instead of leaving the drafter to guess.
Keep the markup and the written list in the same file name and date them. If you send a revised markup later, it should replace the old one, not sit next to it in an inbox.
3. Sort every change into structural or cosmetic
Before you send anything, split the list in two. Cosmetic changes stay inside the existing structure: swapping a tub for a shower, moving a closet door, changing cabinet layout, adding outlets, changing exterior siding from lap to board and batten. Structural changes move or touch something that carries load or defines the building envelope: bearing walls, the footprint, roof lines, ceiling heights, large openings, stairs.
The split matters because structural changes are where cost, time and engineering live. A drafter can usually handle a page of cosmetic notes in one pass. Two or three structural changes can take longer than the whole cosmetic list, and may need a structural engineer to stamp new beams, headers or foundation details depending on your jurisdiction.
4. Trace the ripple of each structural change
A change on one sheet rarely stays there. Ask these questions for every structural item:
- Roof: Does the footprint change? A deeper garage means longer roof framing, a new truss layout or a different ridge height, and possibly a changed front or side elevation.
- Foundation: On a slab, does plumbing move under the concrete? On a basement or crawlspace plan, do new walls need footings or new beam supports?
- Engineering: Does removing or shifting a wall change how loads reach the ground? In hurricane and seismic zones, does it cut into a shear wall or braced wall line?
- Lot and approvals: Does the new footprint still meet setbacks, lot coverage limits and any HOA design rules?
- Energy and safety: Do larger windows still meet your energy code? Do bedroom windows still meet egress?
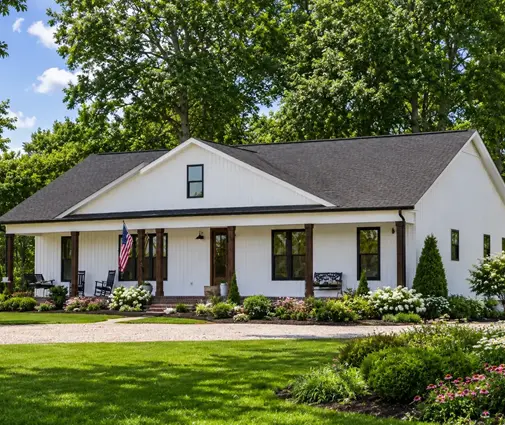
A one-story plan like this four-bedroom Modern Farmhouse ranch with a 3-car garage shows why: every square foot you add to a single-story footprint is also added to the foundation and the roof. On a two-story plan, interior changes upstairs can stack on loads coming from above, so a "simple" moved wall deserves a second look.



5. Rank your changes before you price them
Give each item a priority: must have, want, nice if cheap. Then ask the drafter to quote the list as separate line items. This lets you drop the expensive "nice if cheap" items without reopening the whole conversation. In 2025 and 2026, hourly drafting rates for residential modifications commonly fall somewhere around $60 to $150 per hour depending on region and experience, and engineering is billed separately, so a line-item quote is the only way to see where the money goes.
If a structural "want" costs as much as all your cosmetic changes combined, that is a signal to look at another plan instead. Browsing four-bedroom house plans with the feature already built in is often cheaper than drawing it in.
6. Write a sample change list you can actually send
Here is what a clean list looks like for a typical one-story four-bedroom plan with a 2-car or 3-car garage, paired with numbered clouds on the PDF:
- Extend garage 4'-0" toward the rear for a deeper truck bay and a workbench. Structural. Affects foundation plan, roof plan, rear and side elevations, and lot coverage. Confirm setback on the rear property line.
- Enlarge pantry to a walk-in by moving the wall between pantry and mudroom 2'-6". Structural if that wall is bearing; ask the drafter to confirm. Add shelving on three sides.
- Move laundry from the hall to a room off the primary closet. Structural for plumbing: new supply, drain and vent runs, possibly under slab. Show the dryer vent route to the exterior and the floor drain or pan if required locally.
- Add a bench and cubbies in the mudroom. Cosmetic.
- Change secondary bath tub to a walk-in shower. Cosmetic, though it can affect slab blockouts.
- Add outlets on the kitchen island and in the garage. Cosmetic, electrical plan only.
Item 3 is the one most likely to surprise you: moving a laundry room changes plumbing more than it changes walls. If you want inspiration for item 2, look at plans that already have a butler's pantry or walk-in pantry and borrow the proportions.
7. Ask your questions before the drafter starts
Put every open question in blue on the markup and ask for answers before work begins: Is this wall bearing? Will the extended garage need a different truss package? Does my county require an engineer's stamp for this beam? Can the existing front elevation stay the same?
Also send the information the drafter needs from your site up front: your lot survey or plot plan, the foundation type you will build (slab in much of the South, basement in much of the North and Midwest), any HOA guidelines and the design loads your building department uses for wind, snow and seismic. Drafters often redo work because this arrives after the first round.
8. Check the revised set sheet by sheet
When the revised PDF comes back, do not skim the floor plan and sign. Go through the set in order with your change list beside you:
- Cover and index: revision date and revision number updated on every sheet.
- Foundation plan: new footprint, footings and plumbing locations match your changes.
- Floor plans: each numbered change is clouded, dimensions add up end to end, room names and door swings are correct.
- Elevations: windows, rooflines and garage doors match the floor plan.
- Roof plan and sections: pitches, ridge heights and ceiling heights still work, including over the extended garage.
- Electrical and details: outlets, lighting and schedules updated.
Tick off each item on your list. Anything not clouded, check twice: an unclouded change is easy for a plans examiner or a framer to miss as well.
For a two-story example, compare how changes would flow through a plan like this 2,827 sq ft Craftsman with four bedrooms and a 2-car garage versus a larger 3,030 sq ft Modern Farmhouse with a 3-car garage: on both, a garage change shows up on at least the foundation, main floor, roof and two elevations.
9. Avoid the second round you have to pay for
Most revision quotes include one round of corrections to the drafter's own mistakes. New ideas after the first round are usually billed as new work. To stay inside that first round:
- Freeze the list. Send one consolidated markup, then stop adding.
- Get the builder and, if needed, the engineer to review the markup before the drafter starts, not the finished set.
- Report all corrections in one reply, numbered against the same change list.
- Separate errors from new requests so the drafter can see what was missed and what is new.
If a wish list keeps growing, consider whether a plan closer to your needs already exists. A house like this 3,198 sq ft Southern Farmhouse with four bedrooms and a 3-car garage or a one-story 2,109 sq ft Craftsman with a basement may cover several changes at once.



Sign off with confidence
A good redline set reads like a contract: numbered, dimensioned, sorted by what it costs and checked against every sheet it touches. Do the thinking before the drafter starts, trace each structural change through the roof, foundation and engineering, and review the revised drawings line by line. Then confirm the final set with your local building department and your builder before you submit for the permit, because the requirements of your city or county are what the drawings ultimately have to meet.