The insulation crew finishes on a Friday. The drywall delivery is booked for Monday morning. Then the inspector arrives, finds a missing fire block above the kitchen soffit and two unsealed penetrations in the top plate, and writes a correction notice. The drywall truck goes back to the yard, the hanging crew moves to another job, and the house loses a week. Inspections themselves rarely kill a schedule. Failing one at the wrong moment does.
Under the International Residential Code (IRC), as adopted and amended by your city or county, a new single-family home goes through a fixed sequence of inspections. Names and the exact list differ from one building department to the next, but the order is nearly universal. Here it is step by step, with what gets checked, what commonly fails, and what it costs in time and money.
Step 1: Start With a Plan Set the Inspector Can Read
Every inspection compares the work in the field against the approved plans, which must be on site, along with the posted permit card. A stock plan adapted by a local engineer or drafter is completely normal, but the adaptation has to answer the questions an inspector will ask. These questions cover footing sizes and rebar, foundation anchor spacing, header and beam sizes, shear wall locations and nailing schedules, and hold-down hardware. They also cover window egress sizes in bedrooms, stair dimensions, and the energy code values for insulation and windows.
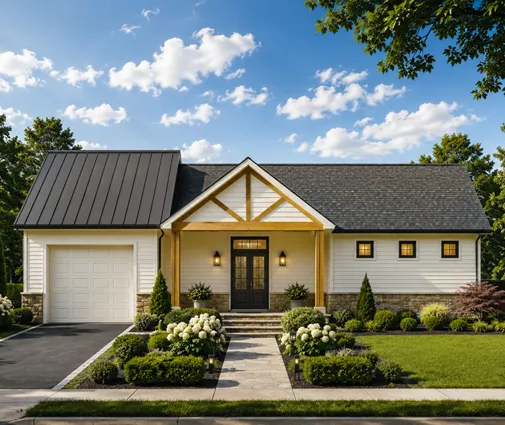
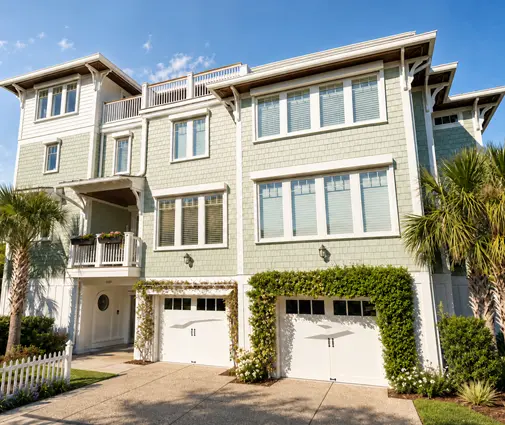
Plans that show these details clearly, with a structural sheet stamped where your jurisdiction requires it, make every later visit faster. The inspector does not have to guess, and your framer does not have to improvise. A straightforward one-level layout such as this 4-bedroom modern farmhouse ranch of 2600 sq ft is easy to review and inspect. A tall coastal house needs far more structural detail.
Time: plan review commonly takes 2 to 8 weeks, longer in busy metro areas. Cost: in 2025, permit fees for a new home ranged from roughly $1,500 to well over $10,000 depending on the jurisdiction and square footage. Inspections are usually included in that fee, and impact or utility fees are often charged on top.


Step 2: Footing Inspection
This is the first inspection on most sites. It happens after the trenches are dug and the rebar is set, but before any concrete is poured. The inspector checks the following:
- footing width and depth, including depth below the local frost line in the North and Midwest;
- bearing on undisturbed or properly compacted soil;
- rebar size, spacing, laps and clearance from the soil;
- the concrete-encased grounding electrode (often called a Ufer ground), where it is used.
Some departments also want proof that the house sits within the setbacks. This proof is usually a form board or foundation location survey. A survey commonly ran $300 to $800 in 2025, which is cheap insurance compared with pouring a foundation two feet into a side yard setback.
Common failures: water or loose soil in the trench, rebar lying on the dirt, and footings shallower than the plans show. A failed footing usually costs only a day or two, because nothing has been covered yet.
Step 3: Foundation, Slab and Under-Slab Plumbing
What happens next depends on your region. On a slab on grade, common across the South and Southwest, the plumber installs the drain lines first. Those lines must pass an under-slab plumbing inspection, typically a water or air test held under pressure. After that, the pre-pour slab inspection covers the vapor retarder, the base, the reinforcement and any slab-edge insulation.
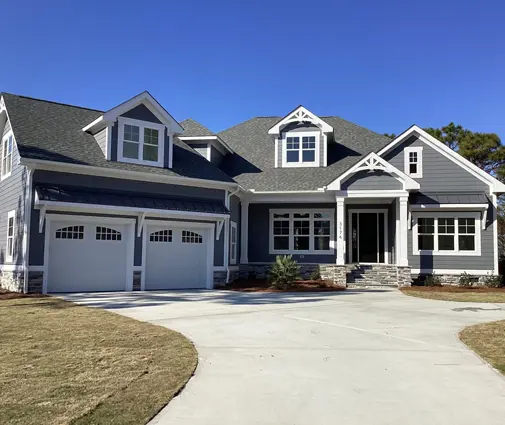
With a basement, the foundation walls are inspected before backfill. The inspector checks the wall reinforcement, the anchor bolts, the dampproofing or waterproofing and the footing drains. A large home like this 4907 sq ft Acadian-style house with a basement passes through this stage with more concrete, more drainage and often an engineer's letter on the wall design. If you are leaning toward a lower level, browse the house plans with a basement and budget for this extra inspection stage.
Time: 1 to 3 weeks of construction, plus 1 to 3 days of waiting for inspection slots.
Step 4: Framing Inspection
The framing inspection is the most detailed visit of the build. The house is fully framed, sheathed, roofed and dried in, and the windows are usually set. The inspector walks every floor and checks:
- headers, beams and point loads carried down to the foundation;
- shear wall nailing, hold-downs and straps, which are critical in hurricane and seismic zones;
- notches and bored holes in studs and joists that exceed IRC limits;
- fireblocking and draftstopping;
- stair rise, run and headroom;
- bedroom window egress;
- the garage-to-house separation.
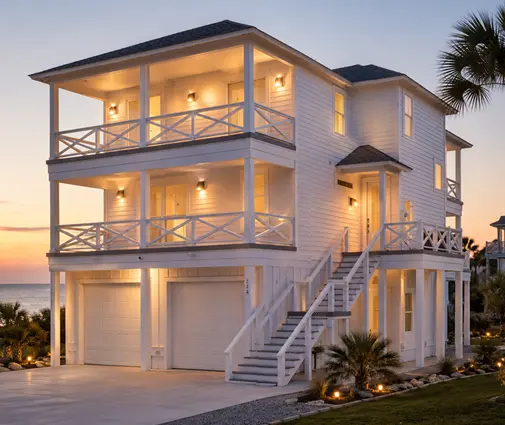
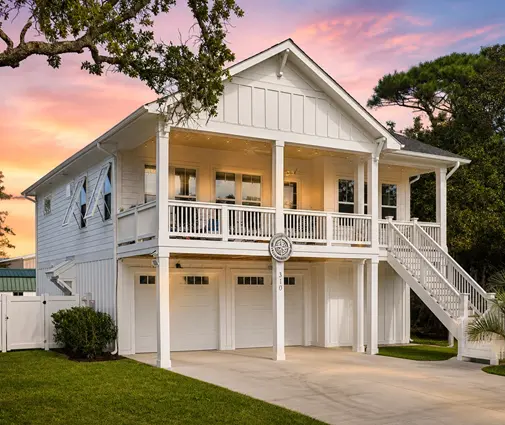
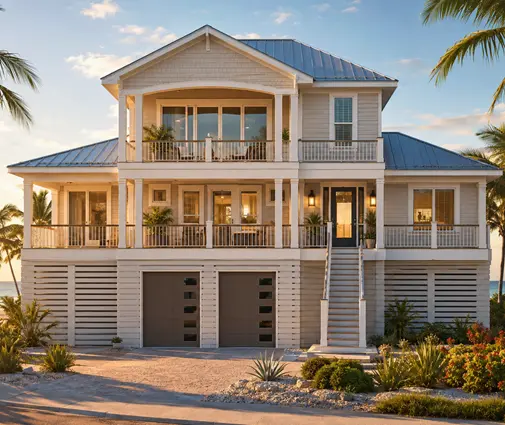
Coastal and high-wind jurisdictions often add a separate roof sheathing nailing inspection before the roofing goes on. Elevated homes like this 4-story coastal plan with 4 bedrooms and 2342 sq ft may also require pile or elevation inspections and an elevation certificate in a flood zone. Check with your local floodplain administrator.
Common failures: plumbers or electricians cutting through framing members, missing hardware, and beams swapped for a "similar" size. Corrections usually take 2 to 5 days.
Step 5: Rough-In Plumbing, Electrical and Mechanical
The rough-ins are often scheduled with the framing inspection, or just before it, as one "cover" inspection. Each trade's work is checked while the walls are still open.
- Plumbing: drain, waste and vent piping held under test, proper slope, venting, nail plates, water supply lines, and gas piping with its pressure test.
- Electrical: box fill, cable support, AFCI and GFCI circuits as planned, required receptacle locations, and the panel and grounding.
- Mechanical: duct sizing and support, combustion air, exhaust fan terminations to the outside, and dryer vent length.
In many jurisdictions each trade contractor schedules their own inspection under their own sub-permit. If you are an owner-builder, you may be the one calling them all in. A bath-heavy design such as this one-story contemporary home with 4 bedrooms and 5.5 baths simply has more rough plumbing to test, so plan an extra day.
Common failures: a test that leaks, a missing nail plate, or a bath fan ducted into the attic instead of outdoors.
Step 6: Insulation and Energy Code Inspection
Many departments inspect the insulation before drywall, based on the energy provisions of the IRC (chapter 11) or the IECC as adopted locally. The inspector compares the R-values in the walls, floors and ceilings with the plans, and checks air sealing at top plates, rim joists and penetrations. They also confirm that window labels match the required U-factor.
Recent code editions also require a blower door test of the whole house, usually done near the final, and often a duct leakage test. Third-party testers commonly charged $200 to $500 per test in 2025. Getting the air sealing right now is far cheaper than chasing leaks through finished drywall.
Common failures: compressed or gapped batts, unsealed attic hatches, and missing insulation behind tubs and showers on exterior walls. This is the inspection whose failure hurts most if the drywall is already booked.
Step 7: In-Between Inspections You Might Not Expect
Depending on where you build, you may also see the following inspections:
- a drywall or gypsum fastening inspection, which some jurisdictions require for fire-rated garage walls;
- a gas line final before the utility sets the meter;
- an electrical service inspection that releases permanent power;
- a fire sprinkler inspection where your local amendments require residential sprinklers;
- septic or well inspections, which are usually handled by the county health department rather than the building department.
Ask for your department's full inspection list when the permit is issued. It is often printed right on the permit card.
Step 8: Final Inspection and Certificate of Occupancy
At the final, every trade must be finished and every fixture working. Inspectors typically check:
- smoke and carbon monoxide alarms;
- handrails and guards;
- GFCI and AFCI protection;
- water heater relief valve piping;
- grading that slopes away from the foundation;
- house numbers visible from the street;
- the energy test reports.
Zoning, fire, public works and sometimes landscaping or tree sign-offs may also be required before the certificate of occupancy (CO) is issued.
The CO matters beyond the building department. Your lender usually needs it to convert a construction loan or close a permanent mortgage, and the appraiser and insurer may ask for it too. A small, simple home like this 2-bedroom cabin of 750 sq ft can pass the final in a single visit. A large home often takes a short punch list and a re-visit. Choosing a straightforward layout from the one-story house plans keeps the number of stairs, guards and other inspection items down.
Time: 1 to 3 weeks from the request to the CO in many areas. Cost: re-inspection fees for any failed visit commonly ran $50 to $200 each in 2025.
Timeline at a Glance
| Stage | Inspection | Typical timing from permit | Delay if failed |
|---|---|---|---|
| Plan review | Permit issued | 2 to 8 weeks before start | Weeks, if plans need revisions |
| Site and trenches | Footing | Week 1 to 2 | 1 to 2 days |
| Foundation | Under-slab plumbing, slab or walls | Week 2 to 5 | 2 to 5 days |
| Structure | Framing, roof nailing | Week 8 to 14 | 2 to 7 days |
| Systems | Plumbing, electrical, mechanical rough-in | Week 10 to 16 | 2 to 5 days per trade |
| Envelope | Insulation and air sealing | Week 12 to 18 | 3 to 10 days, including trade rescheduling |
| Completion | Final, energy tests, CO | Month 6 to 10 | 1 to 3 weeks |
Exact timing varies with the house size, the region, the weather and how busy your building department is. Confirm the inspection list, the scheduling method and the current fees with your local building official, and book each visit only once the work is truly ready.