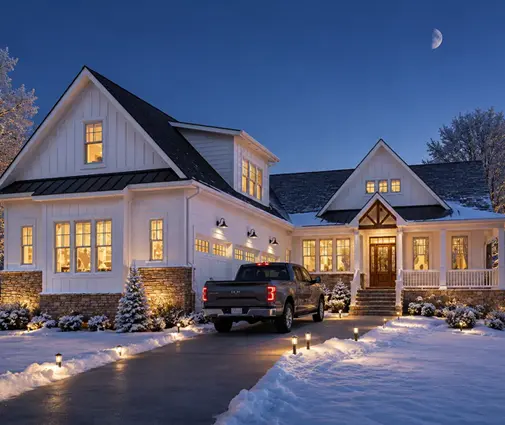
The basement was the reason they bought the lot. A couple with two kids and a third on the way, they had spent four winters in a rented split-level where the lower level smelled like wet cardboard every March. Their new house would have a finished basement: a playroom, a guest bedroom and a place for the treadmill. To get that, they had to make sure that space stayed dry for the next 40 years. Their story follows the order of the build, because that is the order in which the mistakes happen.
Chapter 1: A lot that looked dry in August
The lot sat in a new subdivision on the edge of a mid-sized Midwest town: about a third of an acre, a gentle slope toward the back, a retention pond two lots over. In late summer the ground was hard and cracked. The listing said nothing about groundwater, and neither did the HOA packet, which was mostly about siding colors and fence heights.
Before they closed, their builder suggested a soil report. The geotechnical engineer drilled a few borings and found silty clay over denser clay, with groundwater showing up around 8 feet down in one boring. Clay soils hold water and drain slowly. The engineer's report is what the foundation design would be based on, and it cost far less than any fix after the fact. In 2026 a basic residential soil report typically runs somewhere around $1,000 to $3,000, depending on the region and the number of borings.
The slope also opened a door. With about 4 feet of fall from front to back, a partial walkout was possible. That meant daylight windows and a door at grade on the rear wall, and a natural path for water to leave the house. They started browsing plans designed for sloped lots alongside the general basement house plans.
Lesson: Judge a lot by its soil and water table, not by how it looks in a dry month. A soil report before closing tells you how hard the basement will have to work. A slope can be an asset if the plan uses it.
Chapter 2: Choosing the plan and specifying the walls
They narrowed their search to a few two-story designs that fit the lot width and the HOA's minimum square footage. One favorite was a 2,170 sq ft Modern Farmhouse with four bedrooms on two stories. It had a compact footprint, which means less foundation wall to protect. They also looked at a five-bedroom Colonial-Craftsman of 2,853 sq ft on three levels, which already counted the lower level as living space. For a while they considered a larger 3,590 sq ft Modern Farmhouse with a 3-car garage, until the budget had its say.



They chose the 2,170 sq ft plan. A local drafter adapted it to the lot, added the walkout, and worked with an engineer on the foundation details. This is where the first real decision came up: dampproofing or waterproofing.
Dampproofing is a thin coating, usually sprayed or rolled asphalt, that slows moisture moving through concrete. It does not bridge cracks and it does not resist water under pressure. The IRC generally requires at least dampproofing on concrete or masonry foundation walls that enclose usable space below grade. Waterproofing is a thicker, often rubberized membrane, or a sheet system, that can stretch over hairline cracks and handle hydrostatic pressure. The code calls for it where there is a high water table or severe soil-water conditions. Exactly how your local building department reads "severe" is something to confirm with them.
With clay soil and water at 8 feet, the engineer recommended a true waterproofing membrane plus a drainage board on the walls of the finished rooms. The upgrade over basic dampproofing added several thousand dollars to the quote; in 2026, ranges of roughly $3,000 to $10,000 for a typical basement are common, depending on wall area and system. They paid it.
Lesson: Dampproofing is the code minimum. Waterproofing is what you want under a finished basement on clay or near groundwater. A smaller, simpler footprint is cheaper to protect, so footprint is a drainage decision too.
Chapter 3: The water you never see: drain tile, gravel and the sump
Walls only resist water. The real work is done by the system that carries water away before it builds up against the concrete. Around the footings, the crew laid perforated drain pipe, often still called "drain tile." It was bedded in washed gravel and wrapped in filter fabric so silt from the clay would not clog it. The IRC requires foundation drains around basements in most soils. It also sets a minimum for the gravel bed: it has to extend beyond the footing and rise above its top. Your inspector will check that it is there. Inspectors do not always check how carefully it was installed.
The family's builder ran drain tile on both the exterior and the interior side of the footing. The interior loop sits under the slab and was connected through the footing. The interior loop is not always required, but it is an inexpensive addition when the slab has not been poured yet. Both loops drained to a sump pit in the mechanical room. On the walkout side, part of the water could leave by gravity to daylight, which reduces how often the pump runs.
The sump pump itself was a basic cast-iron unit. They added two things the code does not require:
- A battery backup pump, because the heaviest storms are also when the power goes out. Installed, these commonly ran about $600 to $1,500 in 2026.
- A high-water alarm with a phone alert, for when they are away.
They also asked for a sealed, gasketed sump lid. That helps with humidity, and it mattered for the next item on the list.
Lesson: Drain tile and gravel are what keep the basement dry. The coating on the walls is the second line. Run the tile on both sides of the footing if you can. A battery backup and an alarm cost little next to one flooded finished basement.
Chapter 4: Radon pipe and window wells
Much of the upper Midwest has elevated radon potential. The IRC's radon appendix applies only where a jurisdiction has adopted it, and theirs had. So did many counties in the region. A radon-ready setup is simple during construction. The crew lays a gravel layer under the slab with a vapor barrier on top. A 3- or 4-inch PVC pipe is set in that gravel and runs up through the house to the roof, with an electrical outlet left in the attic for a future fan. Their builder quoted a few hundred dollars for the rough-in. Adding it to a finished house costs far more. After move-in they would test. If the levels came back high, they would only need to add the fan.
The guest bedroom in the basement needed an emergency escape opening. That meant an egress window with a window well large enough to climb out of, and a permanent ladder if the well is deep. The code sets minimum sizes, and the drafter took them from the current local edition. Window wells are also small buckets next to your foundation. Theirs got a gravel base connected down to the drain tile and a clear cover that still opens from inside. One more opening that cannot fill with water.
Lesson: Put the radon pipe in now, even if your county does not require it, because it is cheap before the slab and expensive after. Every window well needs a drain path to the footing drains, not just a scoop of gravel.
Chapter 5: The questions before the backfill
The last moment to see and fix anything is right before the excavator pushes the dirt back. Their builder gave them a half hour on site with the foundation contractor. They brought this list:
- What product is on the walls: dampproofing or waterproofing? Is drainage board or insulation going over it?
- Is the drain tile on the outside, the inside, or both? Is it wrapped in fabric and fully covered with gravel?
- Where does the drain tile discharge: to the sump, to daylight, or both? Can I see the connection?
- Are the window well drains tied into the footing drain?
- Where are the wall penetrations for water, sewer and electrical, and how are they sealed?
- What will the backfill be, and will it be placed in lifts rather than dumped all at once?
- Are the walls braced, or is the first floor framed, before backfilling, so the walls do not crack or bow?
- Does the warranty on the waterproofing require a particular installer or grading condition?
They took photos of every wall, every corner of the drain tile, and the sump connection. That photo set later saved an argument with the landscaper.
Lesson: Once it is backfilled, you will never see the foundation again. Walk it, ask, and photograph everything while it is open.
Chapter 6: Grading, downspouts and the first spring
A perfect foundation can still take on water if the yard sends rain toward it. The IRC asks for the ground to fall away from the house, typically 6 inches within the first 10 feet. Backfill settles, often by several inches in the first year or two. Their builder graded with extra height at the walls for that reason and returned the next summer to top it up.
The downspouts went into extensions that carry roof water well past the backfill zone. On the walkout side, they run into a buried solid pipe to daylight near the swale. The HOA approved the route, because water cannot be dumped onto a neighbor's lot. Mulch beds were kept below the siding line. No one was allowed to build up soil against the house to plant shrubs.
They moved in in October and finished the basement the following spring, after watching it through a full thaw and a week of April storms. The pump ran a few times. The floor stayed dry.
The same steps apply to smaller or single-level homes. A four-bedroom 2,109 sq ft Craftsman ranch, a 2,489 sq ft three-bedroom Ranch with a 3-car garage, and a 1,764 sq ft Craftsman with three bedrooms all sit on full basements. On a one-story house the basement can nearly double the living area, which makes keeping it dry even more valuable.


Lesson: Grading and downspouts are the cheapest waterproofing you will buy. Plan for settling and recheck the slope after the first year. Wait through one wet season before you put drywall on basement walls.
Codes, local amendments and radon rules vary by city and county and change from one edition to the next. Before you build, confirm the current requirements with your building department and have a local engineer or drafter review the foundation details of your plan for your soil.