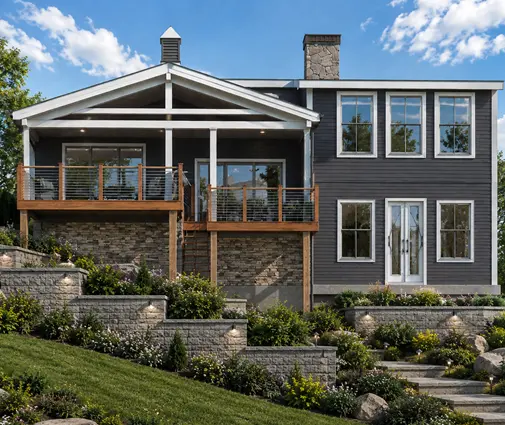
The concrete truck is booked for Tuesday. On Monday afternoon someone asks, "Are we putting tubing in the basement floor?" If nobody has an answer, the default is no, and that decision is permanent. Radiant floor heating is one of the few features in a new house that cannot be added later without tearing out the floor. A finished basement over a warm slab feels completely different from one heated only by a couple of supply registers near the ceiling.
This checklist covers the two systems most American homeowners actually choose between. Hydronic radiant runs warm water through PEX tubing cast into a slab. Electric radiant uses heating mats or cables under tile, usually in bathrooms and sometimes in kitchens. It covers what each costs, what has to be on the drawings, and why you will still want ductwork.
Stage 1: Decide where radiant heat makes sense
- Basement slab: this is the best candidate. Concrete holds heat, basements are the coldest rooms in the house, and the tubing goes in before the pour with little extra labor.
- Garage or shop slab: works well if you will use the space in winter. Check that your local code and the manufacturer allow tubing under a garage slab that carries vehicle loads.
- Bathrooms: electric mats under tile are the usual choice on upper floors, where there is no slab to embed tubing in.
- Kitchens: heat only the open floor. Mats should not go under cabinets or the island, so plan the layout first.
- Main living floor on a slab: possible in a slab-on-grade ranch. Weigh it against how much you would actually use it in your climate.
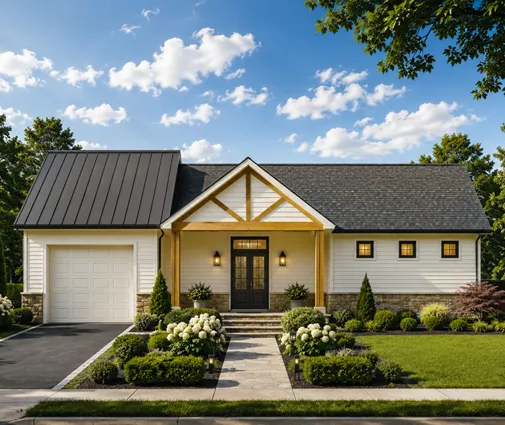
Radiant pays off most in cold-climate homes with a full basement, which is why it fits so naturally in the North and Midwest. A one-story plan like this 3-bedroom farmhouse with a basement under 1777 sq ft of living space can nearly double its usable area once the lower level is finished, and a radiant slab makes that lower level comfortable enough to live in. In much of the South, a heated slab is a luxury rather than a need, and electric mats in the primary bath are usually enough. Browse more house plans with a basement if you are starting from the foundation up.


Stage 2: Get the slab details on paper before the pour
- Sub-slab insulation: rigid foam (XPS or EPS) under the entire heated area, plus edge insulation at the perimeter. Energy codes based on the IRC/IECC require insulation under heated slabs. The R-value depends on your climate zone and on the code edition your city or county has adopted, so confirm it with the building department.
- Vapor retarder: a polyethylene sheet over the foam, with taped seams and taped penetrations.
- Tubing layout: loop lengths, spacing (often 6 to 12 inches on center), and zones drawn on a plan, with the manifold location marked.
- Manifold location: an accessible wall in the mechanical room, not behind a finished wall in the future media room.
- Control joints: saw-cut locations coordinated with the tubing, so the cutter does not hit a loop.
- Pressure test: the tubing is filled and kept under pressure during the pour, with the reading recorded before and after.
- Floor finish: polished or stained concrete, tile and engineered wood conduct heat well. Thick carpet and pad work against you.
Stock plans usually show the foundation without radiant details, so whoever adapts the plan for your lot (your drafter, engineer or builder) should add them to the foundation sheet. Ask for a heat-loss calculation, often called a Manual J. It sizes both the radiant zones and the forced-air system and avoids guesswork. Skipping the foam to save money is the most expensive shortcut here. Without it, a large share of the heat goes into the ground instead of the room.
Stage 3: Choose the heat source and controls
- Condensing gas boiler: efficient and common where natural gas is cheap. A combi boiler can also make domestic hot water.
- Air-to-water heat pump: a strong match for radiant, because slabs need low water temperatures, often roughly 85 to 120°F. Check that installers in your area service this equipment.
- Electric boiler: cheap to install but expensive to run in most regions. It makes sense for a small zone or where electric rates are low.
- Water heater as heat source: sometimes used for a single basement zone. Confirm that the manufacturer and local code allow it.
- Thermostats and sensors: slab sensors and an outdoor reset control keep a slow-reacting floor from overshooting.
- Electric mat circuits: a dedicated circuit with GFCI protection and a programmable floor thermostat in each bathroom.
Think about the mechanical room early. A two-story plan such as this 4-bedroom Modern Farmhouse with 3590 sq ft and a 3-car garage has enough basement area for a proper room for the boiler or heat pump module, the manifold, the water heater and the air handler. In smaller plans, the stair and mechanical layout gets tight quickly, so mark it on the drawings before framing.
Stage 4: Budget for installation and operation
| Item (typical 2026 ranges) | Hydronic slab | Electric mats |
|---|---|---|
| Installed cost of floor system | About $6–$15 per sq ft | About $10–$25 per sq ft |
| Heat source | About $5,000–$15,000+ (boiler or air-to-water heat pump) | None. A thermostat runs about $100–$300 per zone |
| Best for | Large areas: basements, slab ranches, garages | Small rooms: baths, laundry, kitchen floor |
| Running cost | Usually low per sq ft with gas or a heat pump | Higher per sq ft, but rooms are small |
- Electric math: a 50 sq ft bath mat draws about 600 W. At around $0.17 per kWh and 4 hours a day, that comes to roughly $10–$15 a month in winter. Run the numbers with your own utility rate.
- Hydronic math: heat costs depend on fuel price, insulation and climate. Ask your HVAC contractor to compare annual cost estimates against forced air alone.
- Appraisal reality: appraisers may give radiant heat little separate value. Count it as a comfort choice, not an investment.
Prices vary a lot by region and by contractor, so get at least two quotes from installers who do radiant regularly. Ranges like the ones above are useful for comparing options, not for writing a contract.
Stage 5: Keep the ducts for cooling and fresh air
- Cooling: radiant floors do not do air conditioning in American homes. Cooling a floor below the dew point causes condensation, so you still need ducted AC or ductless mini-splits.
- Ventilation: tight new houses need mechanical ventilation, often through an ERV or HRV, and that usually means ducts anyway.
- Humidity control: basements in particular benefit from a dehumidifier tied into the duct system.
- Upper floors: in a multi-story house, forced air or a heat pump can handle the bedrooms while the slab heats the lower level.
So can radiant replace forced air? For heating, often yes, at least on the floors where it is installed. For the whole house, rarely, because cooling and ventilation still need air moving through ducts. The most common setup for American homeowners is a hybrid: radiant in the basement slab and baths, and a ducted heat pump for cooling, ventilation and the upper floors. It works especially well in tall plans like this 5-bedroom, three-story Colonial-Craftsman with 2853 sq ft or this compact 4-bedroom farmhouse with 2082 sq ft over three levels. Single-level living with a basement below, like this 3-bedroom Ranch with 2489 sq ft and a 3-car garage, is also a good fit. There, the garage slab is another radiant candidate if you work in it during the winter.


The most common mistakes
- No insulation under the heated slab, or only at the edges.
- Deciding after the pour, when the only option left is thin electric systems or raised floors.
- A manifold buried behind finished walls with no access panel.
- Dropping ductwork to save money, then adding mini-splits and a ventilation system later at a higher cost.
- Heating under cabinets, tubs or the kitchen island, and covering a warm floor with thick carpet.
- Skipping the pressure test during the pour, so a damaged loop is found only when the system is first started.